
Pound for pound, a galley is the most efficient kitchen layout ever drawn. Two facing runs put the sink, stove, and fridge within a single pivot, which is why professional kitchens are galleys. The trouble is that a badly planned galley feels cramped, and the fix is layout, not size.
A good galley remodel is a planning problem before it is a building one. Get the aisle width, the work zones, and the appliance placement right, and a tight footprint becomes a kitchen that cooks better than a sprawling one. Here are the layout moves that maximize every inch of a galley.
What Maximizes a Galley
A galley is the most efficient kitchen shape there is. Two parallel runs put everything within a step, so a smart remodel is less about adding space and more about laying it out right. The clearances, the work zones, and where the appliances land matter more than square footage.
Nail the layout and a narrow galley out-cooks kitchens twice its size. Keep the aisle right, separate the wet and hot zones, open one end if you can, and steal a little seating from a window or a fold-down. These are the remodel layouts that make a galley earn every inch.
Galley Kitchen Clearance Guidelines

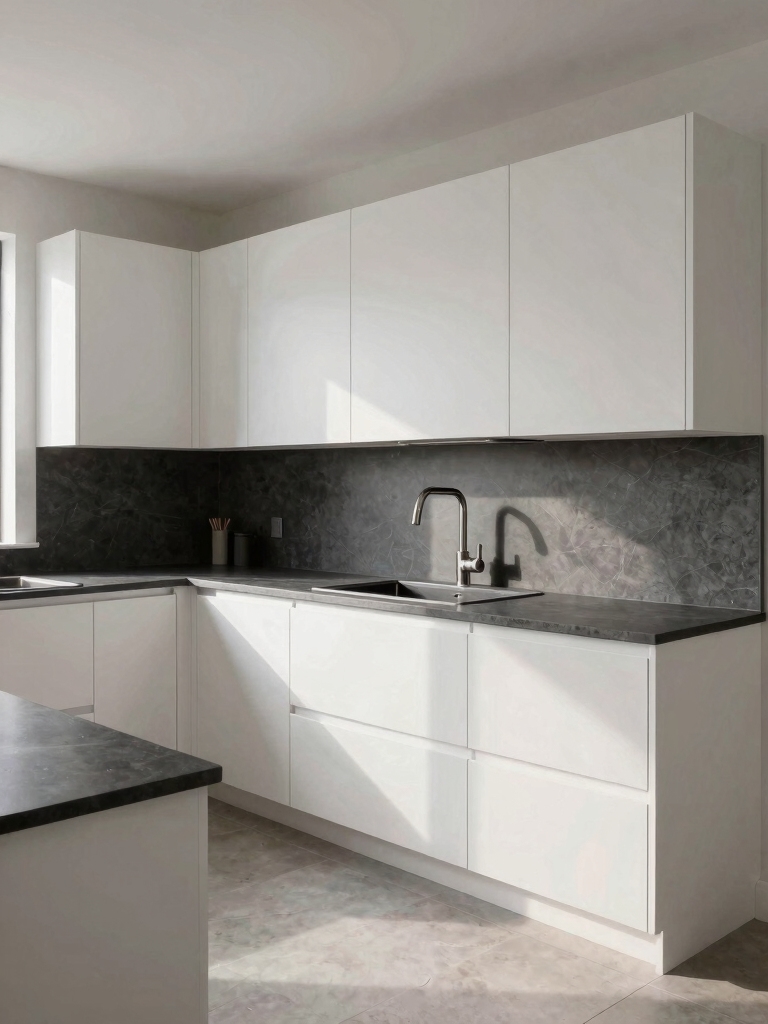
Before anything else, a galley remodel comes down to one number: the width of the aisle between the two runs. Get it wrong and the whole kitchen fights you.
The Aisle Width That Works
For a single-cook galley, aim for an aisle of 42 to 48 inches, enough to open opposite cabinets and the dishwasher without a collision. Drop below 36 inches and two people cannot pass. Go above 48 and you take extra steps between counters all day.
If your galley runs too narrow, a remodel can sometimes steal a few inches with shallower 21-inch base cabinets on one side. I tell people to measure the aisle first, since no amount of pretty finishes fixes a clearance that does not work.
Efficient Small Kitchen Design
Efficiency in a galley comes from the work triangle, the path between sink, stove, and fridge. In a galley that triangle is naturally tight, which is the layout’s superpower when you set it up right.
Put the sink and stove on the same run if you can, with the fridge at the end, so the cook pivots instead of walking. Keep a clear landing counter beside each one. The layout tricks designers use all protect this compact triangle above everything else.
“In a galley, fight the urge to split the sink and stove onto opposite walls just because it looks balanced. Keep them on the same run, with the fridge at one end, so you pivot between them rather than crossing the aisle a hundred times a day. That single choice is the whole efficiency of the shape.”
An Efficient Galley Layout
Galleys come in two basic layouts, and choosing the right one drives the whole remodel. A single-run galley puts all the cabinets on one wall and frees the other for seating or a walkway. A double-run galley uses both walls for the most storage and counter.
Single Run or Double Run
A double run is the most efficient for cooking and storage, so it suits serious cooks and tight footprints. A single run feels more open and works when the galley doubles as a passage to another room. Match the run to how you live.
I recommend mapping your real habits before deciding. If you cook a lot, go double for the counter and storage; if the room is also a hallway, a single run keeps it from feeling blocked. The expert layout remodels weigh exactly this trade-off.
Maximized Counter Space
Counter space is the currency of a galley, and a remodel is the moment to claim every inch. Run continuous counter along each wall with no gaps, take it over a slimline dishwasher, and add a pull-out board to extend it when you cook.
Push the appliances you can hide, the microwave, the toaster, off the counter and into cabinets or a drawer. Even a galley fits a surprising amount of prep space once the counters are unbroken and clear.
- Run unbroken counter along each wall, over the dishwasher too.
- Add a pull-out board for extra prep when you need it.
- Move small appliances off the counter and into cabinets.
| Zone | Minimum counter | Place it near |
|---|---|---|
| Prep | 36 inches | Between the sink and the stove |
| Sink landing | 18-24 inches each side | Under a window where possible |
| Cooktop landing | 12-15 inches each side | Away from the main walkway |
Add an Intentional Peninsula

If your galley is open at one end, a peninsula can add counter, storage, and a spot to sit without closing the room in. It is the galley’s best add-on. It turns the dead end of a run into a working, multi-use surface.
I love a peninsula at the open end of a galley. It gives you a place to eat and a landing zone for groceries, plus a barrier that keeps foot traffic out of the cook’s path. Overhang one side by twelve inches for a pair of stools and the galley gains a breakfast bar at no extra footprint.
Keep the peninsula narrow if the aisle is tight, and make sure it does not pinch the clearance below the width that works. The space-maximizing remodel tricks use a peninsula to do three jobs in one piece.
Flexible Cooking Zones

A maximized galley separates its functions into zones so two tasks never collide. Group prep, cooking, and cleanup into distinct stretches of counter, each with its tools and storage right there.
Zoning makes a small kitchen cook like a bigger one: knives and boards by the prep area, pots and oils by the stove, dish soap and the bin by the sink. In a double galley, you can put the wet zone on one wall and the hot zone on the other for a clean split.
- Group prep, cook, and cleanup into separate counter stretches.
- Store each zone’s tools right where you use them.
- Split wet and hot zones onto opposite walls in a double galley.
👍Zoned galley pros
- +Two cooks can work without crossing paths
- +Everything you need sits within a single step
- +Cleanup and cooking never compete for the same counter
👎Things to plan for
- –Needs enough total counter to split into zones
- –Appliance placement has to be set early in the remodel
- –A too-narrow aisle undoes the benefit, so check clearance first
Open the Galley to the Next Room

One of the highest-impact galley remodels is opening the end or one wall to the next room. Removing a wall at the end, or cutting a pass-through above the counter, floods the galley with light and borrowed space and stops it feeling like a tunnel. Even a single opening to the dining or living room makes a closed galley feel part of the home, not a back corridor. Light changes everything here.
One opening can take a dark, closed-off galley and make it read as part of an open-plan main floor, which is the single biggest perceived-space gain a galley remodel can buy. Confirm the wall is not load-bearing before you plan this, and bring in a structural engineer or licensed contractor if there is any doubt, since that is not a call to make on your own.
- Open one end or a wall to borrow light and space.
- Cut a pass-through above the counter for an instant connection.
- Always verify the wall is not load-bearing with a pro first.
A Cozy Bay Window Nook

If your galley ends at an exterior wall, a bay or garden window is a remodel worth considering. Bumping the window out a foot adds light, a sense of width, and a sunny ledge for plants or a coffee spot without extending the foundation much.
Where there is room at the end, a small built-in bench under the window turns wasted space into a breakfast nook. A galley that ends in light feels twice as open as one that ends in a blank wall. The visual tricks that widen a galley pair well with a bright window at the end of the run.
- Bump out a bay or garden window for light and a sunny ledge.
- Add a built-in bench under the window for a tiny nook.
- End the galley in light, not a blank wall.
A Fold-Down Table for Meals

When a galley has no room for built-in seating, a fold-down or drop-leaf table is the move that adds a place to eat without stealing the aisle. Mounted to the wall or the end of a run, it folds flat while you cook and drops down to seat two when you eat. A wall-mounted fold-down table costs about $80 to $200, installs in an hour or two, and gives a galley the one thing it usually lacks: a spot to sit down.
It earns its hinges daily. Folded up, the table sits flat against the wall and the aisle stays fully clear; dropped down, it seats two for breakfast or a quick dinner without a permanent table ever crowding the run. Pair it with a couple of stools that tuck fully under so nothing blocks the walkway.
- Mount a fold-down or drop-leaf table to a wall or run end.
- Choose stools that tuck completely out of the aisle.
- Fold it flat while cooking, drop it down to eat.
Transform the Kitchen Corner
Galley corners are notorious dead zones, and a remodel is the chance to finally use them. A lazy Susan, a magic-corner pull-out, or angled cabinetry turns the awkward inside corner into reachable, usable storage.
I see galley corners wasted more than any other space in the kitchen. Claim them back. Where a galley meets a wall at the end, an angled or rounded cabinet softens the turn and keeps the walkway clear. Reclaiming the corners adds a surprising amount of storage, the inch-by-inch thinking that makes a galley remodel pay off. The galley makeover ideas almost always start by fixing the corners.
More Galley Remodel Questions
?What is the ideal width for a galley kitchen aisle?
For one cook, 42 to 48 inches between the two runs is the sweet spot, enough to open opposite cabinets and the dishwasher comfortably. Stay above 36 inches at the absolute minimum, since below that two people cannot pass and opposite doors collide.
?Is a single or double galley layout better?
A double run, with cabinets on both walls, gives the most storage and counter and cooks most efficiently. A single run feels more open and works when the galley is also a walkway to another room. Choose based on whether you cook seriously or need the space to stay open.
?How do I add seating to a galley kitchen?
Use a peninsula with a twelve-inch overhang for stools if one end is open, a built-in bench under an end window, or a wall-mounted fold-down table where space is tight. Each adds a place to sit without blocking the aisle.
?Can you open up a galley kitchen?
Often, yes, by removing or cutting a pass-through in a non-load-bearing wall at the end or side to borrow light and space from the next room. Always confirm the wall is not structural with a licensed contractor or engineer before planning the work.
Lay It Out, Then Build It
A galley remodel is won on paper, before a single cabinet is hung. The aisle width, the work triangle, the zones, and where you open the room decide whether the finished kitchen feels cramped or feels like the efficient workhorse a galley is meant to be.
Start with the clearances and the appliance placement, then add the upgrades that fit: a peninsula, a window nook, a fold-down table, corner pull-outs. Get the bones of the layout right, and a narrow galley will out-cook kitchens twice its size for decades.


