

A gallon of sage paint and a free weekend can do what most people assume takes a contractor and five figures. That is the whole reason these before-and-afters keep racking up millions of views: the change looks expensive, and the receipts say it was not. Dated oak walks in, a calm, current kitchen walks out, and almost nobody hired help.
I have done a version of this in my own rental, three weekends and under $200, so I know which corners you can cut and which you cannot. Below are fifteen viral sage transformations sorted by what they actually cost and what made them work. Some are paint-only weekend jobs; a couple are full renos. Either way, there is one here scaled to your budget and your nerve.
Sage Transformations by Effort and Cost
| Approach | Rough cost | Best for |
|---|---|---|
| Peel-and-stick film | Under $80 | Renters who can’t paint |
| Paint lowers only | $80 to $120 | Two-tone on a tight budget |
| Full cabinet repaint | $150 to $250 DIY | Biggest change, two weekends |
| New brass hardware | $3 to $8 a pull | Instant warmth, one hour |
The Before-and-Afters Behind the Sage Obsession

Scroll any of these viral makeovers and the pattern is the same: a single color swap looks like a whole new kitchen. Tired oak or builder-beige cabinets turn calm and current with sage paint and a set of new pulls. That is usually the entire budget.
Why this one color went viral
What makes sage the one that travels is that it behaves like a warm neutral. It hides daily wear better than white, photographs beautifully in any light, and pairs with the brass and wood tones people already own. That combination is catnip for a before-and-after clip.
The honest truth is that you do not need a gut job to get the look. A weekend with a brush gets you most of the way, which is exactly why these projects spread the way they do, jumping from one feed to the next as people realize the kitchen they have been apologizing for is a paint color away from one they would show off.
Which Budget Transformations Are Worth Copying

Not every viral kitchen is something you can pull off at home. I sort them into two piles: the paint-primer-and-hardware projects anyone can copy, and the custom-cabinet, stone-counter renos that need real money.
Two piles: copyable and not
The copyable ones share a formula. Good prep, a quality bonding primer, two thin coats of sage, and warmer hardware. That is it, and it is what carries the change in almost every clip that blows up.
The full renos are still worth studying for the shade and the pairings, even if you only borrow the paint color. For a wider look at what paint alone can do, the case for painted cabinets holds up well beyond sage.
Which sage project actually fits you?
1I rent and can’t paint
Peel-and-stick film, under $80, removable when you leave with no deposit drama.
2I own but I’m on a tight budget
Paint the lowers only, around $80 to $120, for a grounded two-tone look at half the paint.
3I want the full transformation
A complete repaint over two weekends, $150 to $250, plus warm brass hardware to finish.
Honey Oak to Sage: A ’90s Kitchen Updates

The most satisfying versions take honey oak, the orange-toned wood that dates a kitchen faster than anything, and bury it under sage. The dated grain drained the room’s light; the sage hands it back.
This is a sander, a gallon of paint, and a weekend, no contractor required. It is also the single highest-impact move for anyone stuck with a ’90s kitchen they cannot afford to gut.
- Plan on under $200 in paint, primer, and a few new pulls.
- Sand and prime the orange wood well, or the warm tone bleeds through the sage.
- Two thin coats beat one thick one for a smooth, factory-style finish.
A Rental Hack: Removable Sage, No Paint
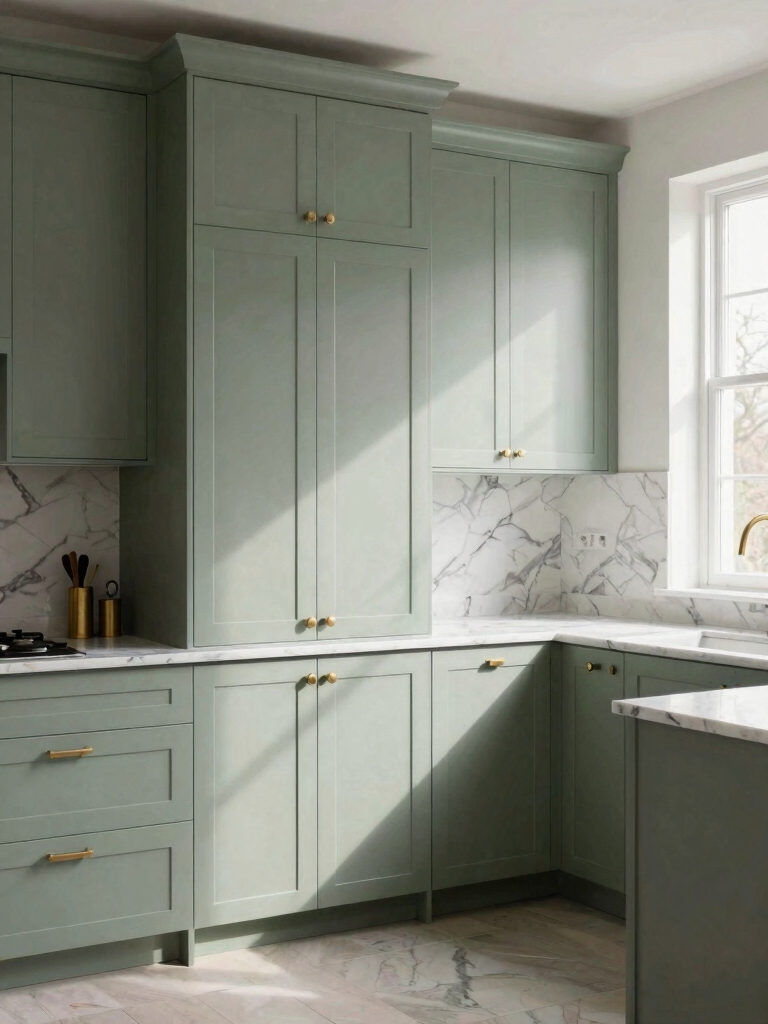
When the lease forbids paint, peel-and-stick vinyl film gets you the sage look without losing your deposit. I love this one for renters. I have measured, cut, and smoothed these sheets over dated rental doors in a single afternoon, and the result looks far better than it has any right to for the price.
- Budget under $80 for enough film to wrap a small kitchen’s doors.
- Measure twice and cut slightly long, then trim in place for clean edges.
- Smooth from the center out with a card to chase out every bubble.
The worry that keeps renters from trying peel-and-stick film:
❌ Myth: Peel-and-stick film looks obviously fake
✅ Reality: Matte, wood-look and solid sage films have come a long way. Smoothed onto clean, flat doors, they pass at a glance and photograph well.
❌ Myth: It will wreck my cabinets when I remove it
✅ Reality: Quality removable film peels off clean from sealed cabinet fronts. Test a corner first, and pull slowly at a low angle when you move out.
Sage and Brass: The Hardware Combo to Copy

Swap builder-grade nickel knobs for warm brass pulls and watch the undertones in sage come alive. It is the cheapest move on this list and among the most visible, hitting that spot between old-school charm and clean modern lines. I reach for unlacquered brass nearly every time.
Unlacquered brass ages to a soft patina over time, which suits sage’s calm; if you want it to stay bright, choose lacquered. Either runs $3 to $8 a pull, so even a full kitchen is rarely more than fifty or sixty dollars.
The one tip people skip: dry-fit your placement before drilling. A pull set a half-inch off looks wrong forever, and you cannot un-drill a cabinet door.
DIY Sage Cabinets in Two Weekends

The pro-looking jobs almost all follow the same two-weekend rhythm, and the secret is in the prep, not the paint. Rush the sanding and priming and it shows; take your time and a foam roller gets you a finish people assume came from a shop.
- Weekend one: remove doors and hardware, clean off grease, sand, then prime.
- Weekend two: two thin coats of sage with a foam roller, drying fully between.
- Budget about $150 to $250 in primer, paint, and supplies for a full kitchen.
The two-weekend painting rhythm in short:
1Strip and clean
Remove doors and hardware, then degrease every surface so paint has something to grip.
2Sand and prime
Scuff-sand, wipe the dust, and roll on a bonding primer to lock out the old finish.
3Two thin coats
Foam-roll two light coats of sage, drying fully between, before rehanging the doors.
Dark Gray to Sage: A Brighter, Inviting Kitchen

Not every before is dated oak. Plenty of viral makeovers start with the heavy, cave-like dark gray that was everywhere a few years ago, and sage lifts that weight off a room fast. The space feels like a stuck window finally opened.
Because you are painting over a finished, sealed surface, prep is mostly cleaning and a bonding primer, which keeps this one cheap. One DIYer did the whole kitchen for under $90 in paint.
- Use a bonding primer so the new sage grips the old painted finish.
- Go a touch lighter than you think, since sage darkens on a big cabinet run.
- Add warm lighting, since gray-era kitchens often have cool bulbs that fight sage.
Lower Cabinets Only: Why Two-Tone Sage Works

Painting only the lowers sage and leaving the uppers light is the budget-smart version that keeps showing up in feeds. It grounds the room with an earthy anchor and costs half the paint of a full repaint.
Half the paint, twice the sense
It also wears better day to day. The lower cabinets take the scuffs and splashes, and a deeper color hides them, while the light uppers keep the space open and bright.
This is the move I tell nervous clients to start with. The logic behind most two-tone cabinet schemes applies here exactly: ground the room down low, keep it light up high, and the eye reads the whole thing as intentional rather than half-finished.
Sage Cabinets and Butcher Block, Cottage-Style
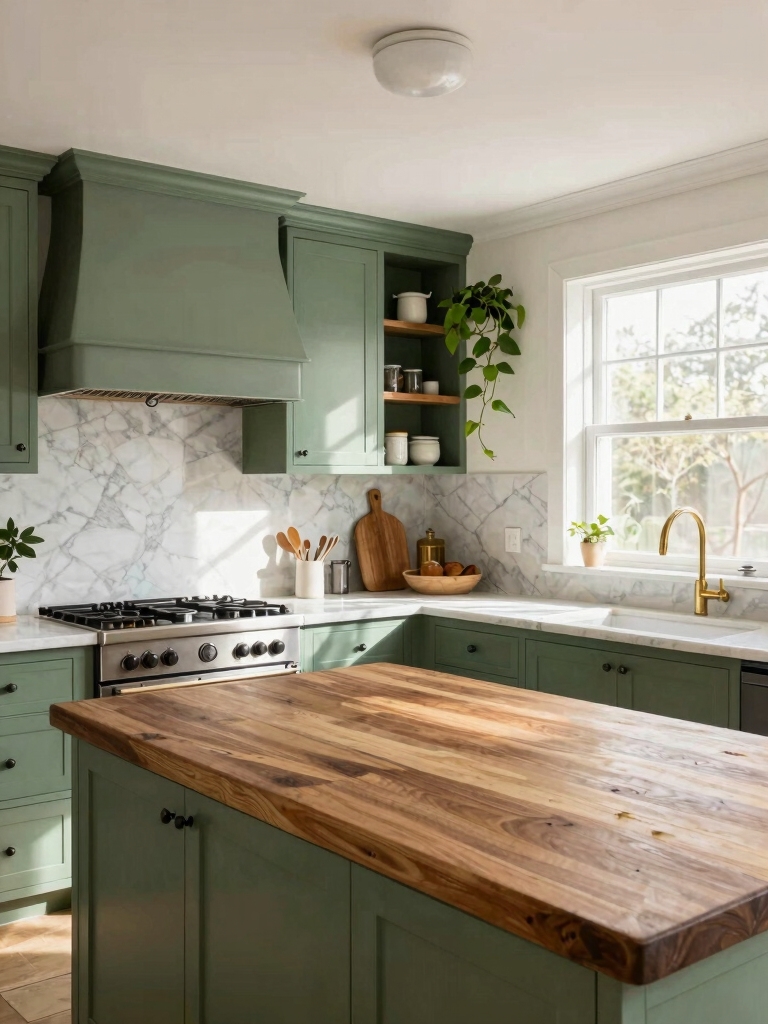
The cottage versions pair sage cabinets with a honey butcher-block counter, and the warmth of the wood is what tips the whole look from plain to collected. It is the combination that photographs as cozy without trying.
Butcher block keeps the budget friendly too, often a fraction of stone, though it asks for oiling every month or two to stay sealed. Pair it with brass and a few open shelves and you have the full cottage formula.
- Choose maple or oak block for durability under daily prep.
- Oil it every month or two so water rings never set in.
- Keep walls and counters light so the sage cabinets stay the star.
A Budget Sage Reno: Save Here, Spend There

The smartest viral renos are not the cheapest; they are the ones that spend in the right places. Put your money into good primer, quality paint, and hardware you touch every day, because those are what make a sage kitchen read expensive.
Save everywhere else. Keep the existing cabinet boxes if they are sound, skip custom anything, and do the labor yourself over a couple of weekends. That is how a full-kitchen change lands closer to a few hundred dollars than a few thousand.
If you want a longer list of where to cut without it showing, the same thinking runs through most budget remodel hacks worth following.
Styling Tips and the Mistake First-Timers Make
Two details decide whether your sage looks designed or accidental. First, get the light right: sage shifts hard from cool daylight to warm bulbs, so test your swatch on an actual cabinet door at the times you cook before you commit to a gallon.
A green that looked perfect at the store can turn gray and flat under your evening lights. Second, choose a matte or satin finish, since high-gloss sage looks cheap, while a low sheen looks far more expensive for the same paint cost of roughly $40 to $60 a gallon.
The mistake almost every first-timer makes is skipping prep. Sage paint over greasy, unsanded, unprimed cabinets peels and chips within months, and then the viral dream becomes a redo. Spend the first weekend cleaning, sanding, and priming, and the color will hold for years. Finish with warm brass hardware and a couple of open shelves styled with what you actually use, and the whole thing comes together.
Your Turn for a Before-and-After
The reason these sage kitchens go viral is not magic; it is a color that flatters almost any room and a method cheap enough for almost any budget. Match the approach to your lease and your wallet, respect the prep, and you get the same expensive-looking result the clips promise.
Start with the smallest version that excites you, whether that is a set of brass pulls or a single weekend with a brush. The hardest part is taking the first door off its hinges. After that, the transformation mostly paints itself.
More Hair Ideas


