
Stand in a kitchen with a great island and you can feel it before you can name it: the prep space falls where your hands want it, you can squeeze past someone at the dishwasher without a shuffle, and there is a spot to perch with a coffee. A bad island gets all of that wrong, and no amount of pretty stone fixes a clearance you have to sidestep around every day.
These nineteen concepts are about designing an island that works, not just one that photographs well. I have built in the real numbers that decide success, the clearances, the overhangs, the minimum sizes, alongside the ideas, so you can bookmark the ones that fit your kitchen and skip the ones your floor plan cannot carry.
Island Design, in Short
- Clearance comes first. Leave 36 to 42 inches of walking space on every side, or the island fights you daily.
- Function should lead the shape. Decide whether the island is for prep, seating, storage, or all three before you size it.
- Seating needs room. Plan a 12-inch counter overhang and about 24 inches of width per stool.
- An island only earns its space if the kitchen has it. Below the clearance minimums, a cart or peninsula serves better.
Perfectly Size Your Island

Sizing is the decision that makes or breaks an island, and it starts with the space around it, not the island itself. The walkways are what you live with every day, so set those first and let the island fill what is left. The island regret I see most often is one built an inch too close to the run. These are the numbers that keep an island from becoming a daily obstacle.
- Leave 36 to 42 inches of clear floor on every side; tighter than 36 and two people cannot pass.
- On the appliance side, lean toward the wider end so a dishwasher or oven door can open fully.
- Aim for a minimum island footprint around 40 by 40 inches to be useful; below that, a cart works better.
Balanced Kitchen Island Harmony

An island should feel proportional to the kitchen around it, neither a postage stamp lost in a big room nor a monolith crammed into a small one. Getting that balance right is what makes an island look designed and intentional. Here is how to scale it.
- Keep the island roughly in proportion to the room, leaving generous clearance all around it.
- Match the island’s style and material to the perimeter so it reads as part of the kitchen.
- In a long kitchen, a longer, narrower island flows better than a square one that pinches the walkways.
💡Pro Tip
Before you commit to an island, tape its full footprint on the floor, including the seating overhang, and live with it for a few days. Cook around it, open the imaginary dishwasher, walk the paths you actually use. Most island regrets, too big, too close to the run, no room to pass, would have been obvious from a strip of painter’s tape and a weekend of pretending. It is the cheapest design test there is.
Multifunctional, Space-Saving Islands

The hardest-working islands do three or four jobs at once, which is exactly what makes them worth their footprint in a busy kitchen. A single island can hold prep space on top, storage below, a spot to eat on one end, and a place for the microwave or trash pullout, turning one piece of furniture into the engine of the room.
Plan the functions before the finishes. Decide which jobs your island needs to do, then design the storage and surfaces around them, deep drawers for pots, a pullout for bins, an outlet for small appliances. An island designed around real use feels easy to work at, even when it is small.
In a compact kitchen, this multifunction is what justifies the island at all. If it only adds counter space, a peninsula might serve better; if it adds counter, storage, seating, and a home for the microwave, it earns every inch. For the small-kitchen version, see ideas that double small-kitchen storage.
Built-In Sinks and Strategic Prep Zones

Building a sink or a prep zone into the island changes how the whole kitchen flows, because it moves the busiest work to the center of the room where you can face out. A prep sink on the island, paired with a stretch of uninterrupted counter, creates a command post that keeps the cook in the social heart of the space instead of facing a wall.
Sink or No Sink
Function follows plumbing here, so plan early. Adding a sink to an island means running water and drainage under the floor, which is a real, permitted job for a plumber, so it belongs in a planned renovation. Site the sink with enough counter on both sides, at least 18 inches, so there is room to actually prep beside it.
If plumbing is off the table, you can still design a strategic prep zone. A clear, deep stretch of island counter near the stove, with a knife block, a compost bin pullout, and good light overhead, gives you most of the workflow benefit with none of the plumbing cost.
Find the island concept that fits your kitchen.
1Small kitchen, tight on floor space
A compact multifunction island or a rolling cart. If you cannot keep 36 inches of clearance, skip the built-in island.
2Big open kitchen, lots of cooks
A large multifunction island, or even dual islands, to separate prep from gathering.
3You mostly want a place to gather
A seating-focused island or breakfast bar with a generous overhang and room for stools.
Cozy Breakfast Bar Moments

Adding seating is what turns an island from a work surface into the spot the family actually gathers at, and it is the feature people remember. The trick is giving knees and elbows enough room, because cramped seating goes unused. These are the numbers that make a breakfast bar comfortable.
- Plan a 12-inch counter overhang for standard-height seating so knees fit underneath.
- Allow about 24 inches of width per stool so people are not bumping elbows.
- Match the counter height to the stool: 36-inch counter with counter stools, or a raised 42-inch bar with taller stools.
Dual Islands for Enhanced Efficiency

In a large kitchen, two islands can outperform one giant one by separating the jobs cleanly. One island becomes the prep and cooking zone, the other the seating and serving zone, so the cook and the guests are not competing for the same surface. It is a luxury concept, but in a big open kitchen it solves real congestion.
Dual islands only work with serious square footage.
- Keep the 36 to 42 inch clearance between the two islands and around both, which eats a lot of floor.
- Give each island a clear job, one for work, one for gathering, so they do not feel redundant.
- Match their materials so two islands read as a planned pair.
An island is the only piece of furniture you walk around a dozen times a day. Get the inches right and you stop noticing it; get them wrong and you feel it every single time.
Curved Islands That Enhance Flow
A curved or rounded island is the concept for kitchens where traffic flows around the island, or where sharp corners are a hazard. The soft edge guides people around it naturally and removes the hip-bruising corner, which matters in a busy household or one with small kids. It also adds a sculptural, custom quality. Here is what to know before you curve.
- Expect a higher cost, since curved cabinetry and a curved counter are custom work, not stock.
- Use the curve where people actually round the island, so it earns its keep in real flow.
- Pair a curved island with simpler perimeter cabinets so the shape stays the special element.
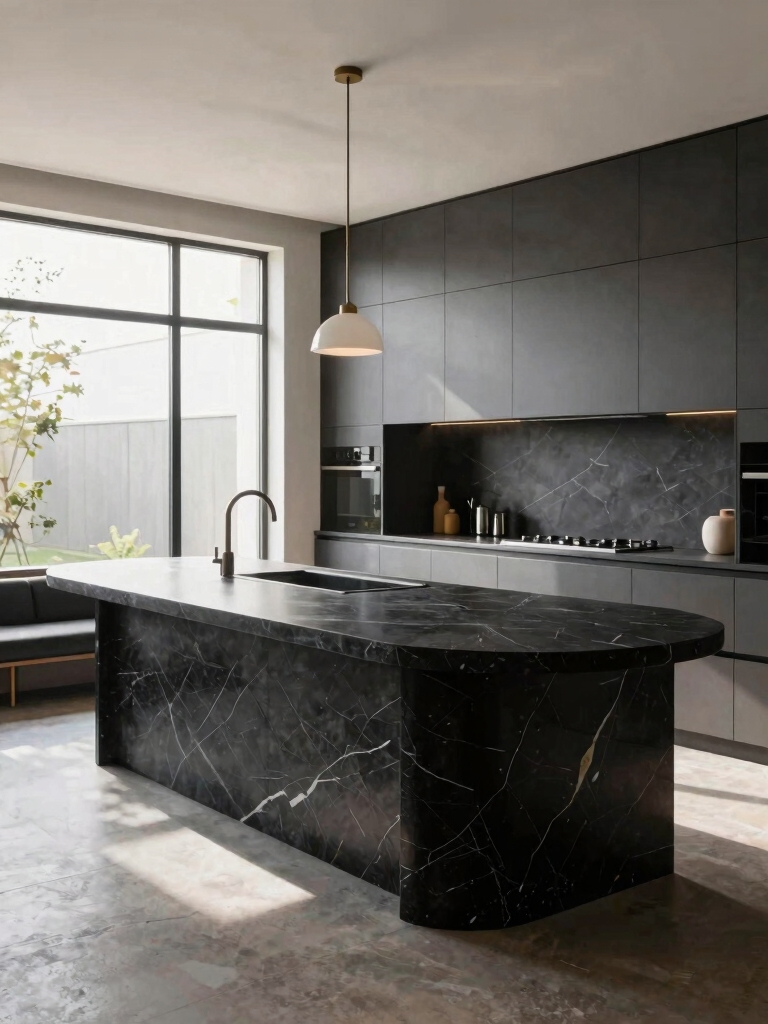
Sculptural Elegance in the Kitchen

At the high end, the island becomes a piece of sculpture, a waterfall-edge slab, a monolithic stone block, or a furniture-style piece on legs that anchors the room like art. This is the island as statement, where the form itself is the point and the material does the talking. It suits modern and minimalist kitchens that want one dramatic gesture.
Pulling off a sculptural island takes restraint and budget.
- Let the material be the star, a dramatic stone or a warm wood, and keep the form clean and simple.
- A waterfall edge, where the counter material runs down the sides to the floor, reads custom but adds real cost.
- Keep everything around a sculptural island quiet, so the piece reads as intentional art. For confident statement looks, see green islands worth the investment.
Stylish Two-Tone Island Design
Painting or finishing the island differently from the perimeter cabinets is the easiest way to give a kitchen depth and a clear focal point. A contrasting island, a deep color against light perimeter cabinets, or a wood island in a painted kitchen, anchors the room and lets you be a little bolder in one contained spot. Here is how to do two-tone well.
- Make the island the deeper or bolder tone, so it grounds the room while the perimeter stays light and airy.
- Tie the two together with one shared hardware finish so the contrast looks planned.
- Repeat the island color in a small accent elsewhere so it feels woven in. See how two-tone proves its worth.
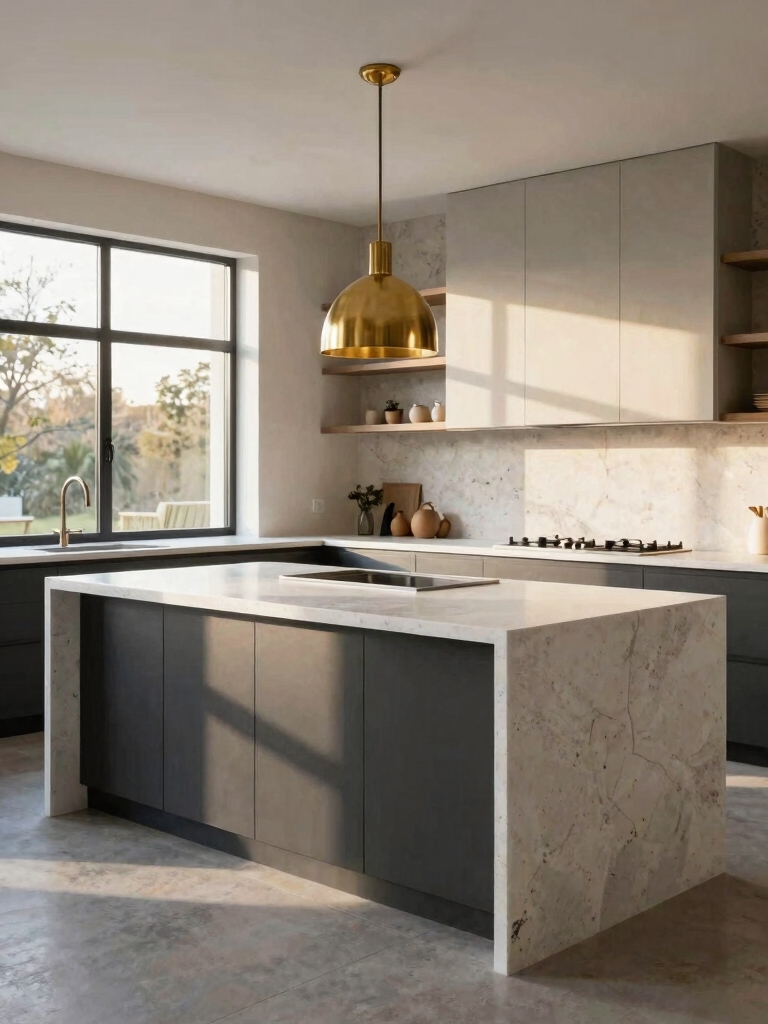
A Bold Island Focal Point

Because the island sits at the center of the kitchen, it is the natural place to put your one bold move, whether that is a saturated color, a dramatic stone, or a striking set of pendants overhead. Concentrating the drama on the island lets the rest of the kitchen stay calm and lets you commit to something daring in a single, contained spot. If you want one statement, this is where it lands best.
The lighting above is part of the focal point, so design them together. A pair or trio of pendants scaled to the island length frames it and pulls the eye, and choosing fixtures that echo the island’s metal or material ties the whole gesture together. The island and its lights should read as one deliberate centerpiece.
Maintenance & Care
An island takes more daily use than almost any other surface in the kitchen, so the counter you choose decides how much upkeep you sign up for. Quartz is the low-effort champion: it wipes clean, resists stains, and needs no sealing, which makes it the easy pick for a hardworking family island.
Butcher block brings warmth but asks for re-oiling every month or two and careful drying around any sink. Natural stone like marble or soapstone is beautiful but wants periodic sealing, roughly once a year, to fend off stains.
Whatever the surface, a few habits keep an island looking sharp for years. A quick daily wipe takes under a minute and matters most for acidic spills like lemon and wine on stone, so clean those fast, use a board rather than cutting directly on the counter, and keep felt pads under anything that sits permanently so it does not scratch or ring.
If your island has seating, check the overhang support now and then, since a long unsupported overhang can crack under weight, and add steel brackets or corbels if it flexes. Treated well, a good island outlasts every trend you put around it.
Kitchen Island Questions, Answered
?How much clearance does a kitchen island need?
Plan 36 to 42 inches of clear floor on every side. Thirty-six is the workable minimum for one person to pass and a cabinet door to open; 42 to 48 is more comfortable on the appliance side and in kitchens with multiple cooks. Tighter than 36 inches, an island starts to feel like an obstacle, and a cart or peninsula is the better call.
?How big should a kitchen island be?
A useful island is at least around 40 by 40 inches, and it should stay proportional to the room with generous clearance left around it. Bigger is not automatically better; an oversized island that crowds the walkways works worse than a smaller one with room to move. Size the walkways first, then let the island fill what comfortably remains.
?How much overhang do I need for island seating?
Allow a 12-inch counter overhang for comfortable knee room at standard counter-height seating, and about 24 inches of width per stool. A long unsupported overhang needs hidden steel brackets or corbels so it will not crack under weight, which is worth confirming with whoever installs your counter.
?Can I put a sink or stove in my island?
Yes, and it can transform the workflow, but it means running plumbing or gas and electrical under the floor, which is a permitted job for licensed pros and a real budget line. Plan it into a renovation rather than a quick update, and leave enough counter on both sides of a sink, at least 18 inches, to actually prep beside it.
Design for the Inches, Then the Look
What separates an island you love from one you tolerate is rarely the finish; it is the inches. Get the clearances, the overhang, and the function right, and almost any style sitting on top of that will work and keep working for years. Get them wrong and the prettiest stone in the world will not save you from the daily shuffle. Design the island around how you move and cook first, then make it beautiful.
Start with a roll of painter’s tape and the numbers in this guide, and let your real kitchen tell you what fits before you fall for a picture. Which of these concepts would actually work in the space you have?


