
What if the only thing standing between you and an outdoor kitchen is the price tag? The catalog versions run five figures, but almost every part of them can be built, salvaged, or faked for a fraction of that. A grill station can be dry-stacked cinder blocks. A counter can be a bag of concrete mix. A bar can be a thrifted dresser.
The trick to an outdoor kitchen on a budget is to spend your money on the cooking and your sweat on everything else. Below are the hacks that build a real, working cook space for the price of a few weekend trips to the hardware store, starting with the plan that keeps you from wasting a dollar.
The Budget Build, in Short
The biggest savings come from the structure, not the gadgets. Dry-stacked cinder blocks, repurposed crates, and a poured concrete counter give you a full kitchen body for well under a few hundred dollars. Put the money you save toward a grill you actually like.
Salvage is the whole game. A free pallet, a thrift-store dresser, a discarded washer drum, and an under-$20 ammo can each replace a part that costs ten times as much new. Plan the layout first so you only buy and build what you will really use.
Start by Mapping the Layout

The cheapest tool in a budget build is a sheet of graph paper. Before you buy a single block, measure your patio and sketch where the grill, counter, prep space, and storage will sit, leaving room to walk and work. A plan stops the two things that waste money fastest: overbuying materials and building something you have to tear out and redo.
Keep the cooking and prep close together so you are not carrying hot food across the yard, and push seating out toward the view. Sketching it first also turns into your shopping list, so you buy the right number of blocks and bags the first time. A good layout is free, and it saves more than any single hack here, the same groundwork behind the simplest outdoor kitchen layouts.
- Measure the patio and sketch every zone before buying.
- Keep the grill and prep counter within a step of each other.
- Turn the sketch into an exact materials list to avoid overbuying.
A Grill Station From Cinder Blocks

The cinder-block grill station is the hack that makes the whole project feel real. It is almost free. Standard blocks run about $2 each, so a sturdy U-shaped surround usually lands under $50. The best part is that you dry-stack them, no mortar, no skill required, which means you can rebuild or move the whole thing on a Saturday afternoon.
Lay the first course on a level base and check it with a level, since everything above depends on that first row sitting flat. Stagger the joints as you stack the second and third courses so the wall locks together. Leave a block-wide cavity to set a grill grate over charcoal, or build the U around a grill you already own. It is a tough, instant station for the cost of lunch, and it scales right up to the boldest concrete outdoor kitchen designs.
- Dry-stack standard blocks, about $2 each, for a sub-$50 station.
- Level the first course carefully; the whole wall rides on it.
- Stagger the joints so the stack locks together without mortar.
📋Your budget-build starter kit
- ✓A level, a tape measure, and graph paper for the layout
- ✓A drill, a circular or hand saw, and a bag of exterior screws
- ✓Exterior paint, outdoor stain, or marine varnish plus a sealer
- ✓Work gloves, eye protection, and a dust mask for cutting and pouring
A Pizza Oven From a Drum or Clay Pot

A wood-fired oven is the splurge that budget builders think they have to skip, but a steel drum or a large terracotta pot gets you most of the way for very little. Source a clean, used 55-gallon drum or a big clay pot, line the inside with firebrick or refractory cement to hold heat, and cut a door opening if you are using the drum.
Set it on a simple block base, add a short length of scrap pipe as a chimney, and you have an oven that hits real pizza temperatures. The savings are dramatic. The materials usually total well under $150, a tenth of a built-in masonry oven, and once it is hot it bakes a pie in just a few minutes. It is the most fun you can have with salvaged steel.
- Use a clean 55-gallon drum or a large terracotta pot as the shell.
- Line it with firebrick or refractory cement to hold the heat.
- Add a scrap-pipe chimney and a block base; keep it under $150.
A Smoker Box From an Ammo Can

A surplus ammo can is one of the great budget-cooking finds. You can usually grab one for under $20, and its thick steel and tight gasket make it a natural little smoker box once you prep it. The whole project costs a few dollars more than the can itself.
Prep the can before any food touches it
Start by scrubbing the can inside and out with hot, soapy water to strip any oil or residue, then run it empty over heat once to burn off the rest before any food goes near it. Drill a few holes for a thermometer and a vent, add a small rack or a foil tray for wood chips, and set it over a low burner or coals.
From there it works like any smoker: a handful of soaked chips, low heat, and patience. The can is small. It handles a single rack of ribs or a couple of chicken thighs at a time, ideal for a quiet cookout. For the price of a sandwich, you have added real smoke to the budget kitchen.
Heads-Up
Before cooking in any repurposed container, an ammo can, a steel drum, a washer drum, scrub it inside and out and burn it off empty once to clear fuel, oil, or coatings. Keep open-flame cookers clear of fences, eaves, and branches, and set them on a stable, level base.
Cabinets From Repurposed Crates
Wooden crates are the budget answer to outdoor cabinetry. You can often find them free or cheap behind markets and orchards, and a quick clean and sanding gets them ready for duty. Screw a few together and you have open shelving or, with simple hinges and a latch, a closed cabinet, all for the price of the hardware.
Their rustic look happens to suit an outdoor kitchen, so the savings come with style attached. The price is hard to beat. Seal them with an outdoor stain or spar varnish so they survive the weather, and mount the heavier ones to a wall or frame so a tall stack stays put. It is the rare hack that looks intentional and costs almost nothing, the same easygoing charm behind any backyard outdoor kitchen space.
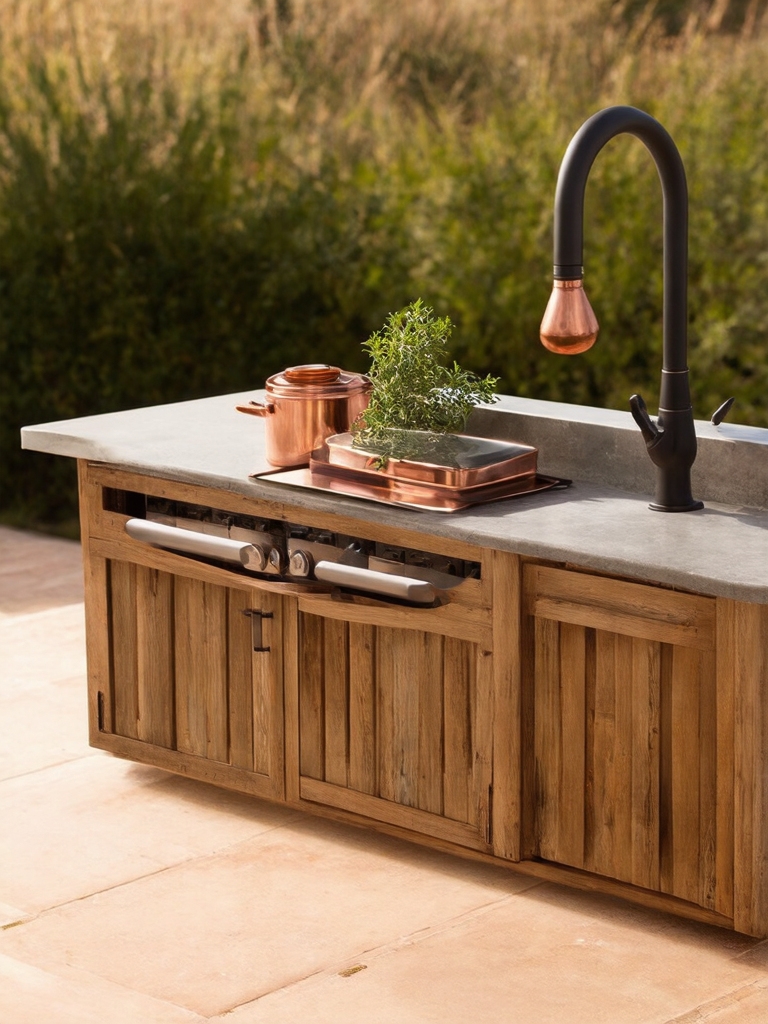
Concrete Countertops on the Cheap

A poured concrete counter is the hack that punches far above its price. A bag of standard concrete mix runs about $5 to $7, so even a generous counter usually costs less than $40 in materials, against hundreds for a pre-made slab. Build a simple melamine form to the size you want, pour and screed the mix, and work the surface smooth as it sets.
Patience is the only hard part. I recommend letting the slab cure for a full 48 hours before you lift it, then sealing it with a food-safe concrete sealer to keep stains and weather out. A reseal about once a year keeps it solid for the long haul. The finish has a tough, modern look that reads expensive, which is exactly the trick a budget build is after.
💡Make the concrete last
Let a poured counter cure a full 48 hours before you lift it, then brush on a food-safe concrete sealer. A quick reseal about once a year keeps stains and weather out and the surface looking sharp for years.
A DIY Sink From a Tub and Camping Faucet

An outdoor sink sounds like the part that needs a plumber, but a basic rinse station does not. You can rig one from a heavy plastic tub, a hand-pump camping faucet, and a garden hose for around $30 total, no permanent plumbing involved.
Cut a hole for the faucet, drill a drain at the bottom of the tub, and run the hose in for fresh water. Set a bucket underneath to catch the graywater and empty it into the garden or a drain, and keep the setup to rinsing hands, produce, and tools rather than anything that needs hot water or waste lines.
It is enough to keep you from running inside every five minutes. That is the whole point of cooking outside. For anything beyond a rinse station, like a hard-plumbed sink on a supply and waste line, bring in a licensed pro, since water lines and drainage are worth doing right, much like a thoughtfully planned small outdoor kitchen layout.
- Build the basin from a heavy plastic tub, around $30 all in.
- Use a hand-pump camping faucet and a garden hose for water.
- Catch graywater in a bucket; leave hard plumbing to a pro.
A Bar Counter From a Refurbished Dresser

A solid wood dresser makes a brilliant outdoor bar once you weatherproof it, and a sturdy one turns up at thrift stores and curbside for $20 to $40. Look for real wood. Particleboard swells and falls apart outdoors, so leave it on the shelf. Strip any flaking finish, sand it down, and seal everything with several coats of exterior paint or marine varnish so it shrugs off rain and sun.
The drawers become storage for napkins, tools, and bottles, and a sealed plywood or tile top turns the surface into a serving and drinks bar. I love how a piece headed for the landfill ends up the most useful thing in the yard, the kind of upcycle that fits right into a covered outdoor kitchen design.
- Choose a real-wood dresser, $20 to $40, over particleboard.
- Seal it with exterior paint or marine varnish, several coats.
- Use the drawers for storage and add a sealed top for the bar.
Smart Storage From PVC and Buckets

Once the big pieces are built, a few dollars of PVC pipe and galvanized buckets handle the clutter. Cut short lengths of wide PVC and mount them to a wall or the side of a cabinet as holders for tools, skewers, and long-handled brushes, so the counter stays clear for cooking. A full-length pipe rolls up towels, and a row of buckets hung on hooks corrals foil, wraps, and bulk spices.
The whole system costs maybe $15 and keeps everything within a reach of the grill, which is what makes a small space actually work. Mount it all at the height your hands fall to naturally, label the buckets if you like, and you get the organized feel of a custom kitchen for the change in your pocket. I tell people that storage is where a budget build either stays usable or turns into a pile, so give it the same care as the cooking.
- Mount cut PVC pipe as holders for tools, skewers, and brushes.
- Hang galvanized buckets for foil, wraps, and bulk spices.
- Keep it all within a reach of the grill; budget about $15.
A Tidy Trash and Recycling Bin Frame

Nothing breaks the look of a nice outdoor kitchen like a pair of bins parked in the open, and a simple wood frame fixes it for a few dollars of lumber. Measure your trash and recycling cans first, then build a basic frame to slide them into, with about a half-inch of wiggle room around each so they drop in and lift out easily. Check that the height clears the lids and that any door or top has room to swing.
Build it from the same pallet or scrap wood as the rest of the kitchen so it blends in, and seal it against the weather. Tucking the bins into a frame at the end of the counter keeps cleanup a step away while it stays out of sight. It is a small project. Still, it is the one that makes a DIY kitchen read as finished and pulled together.
Common Mistakes to Avoid
Most budget builds go wrong in the same few places. The biggest is using indoor materials outside: particleboard cabinets, untreated wood, and indoor paint all swell, rot, or peel within a season, so the cheap version ends up costing more.
Skipping the sealing step on concrete, crates, and the dresser is the close runner-up, since a few dollars of sealer is what buys you years instead of months. And building before planning leads to the most expensive mistake of all, tearing out finished work because the grill turned out to block a door.
Safety is the place not to cut corners. Keep any open flame and the cinder-block or drum cooker well clear of fences, eaves, and low branches, and set them on a stable, level base so nothing tips. Never cook in a repurposed container until you have scrubbed and burned off every trace of fuel, oil, or coating. And leave gas lines, hard plumbing, and any permanent wiring to a licensed pro, since those are the parts where doing it cheap is not worth the risk.
Budget Outdoor Kitchen Questions, Answered
?How cheaply can you build a DIY outdoor kitchen?
A basic but real setup, a dry-stacked cinder-block grill station, a poured concrete counter, crate cabinets, and an upcycled bar, can come together for a few hundred dollars if you salvage and do the work yourself. The grill is usually the biggest single cost. Building the structure yourself is where the dramatic savings come from, since that is the part contractors charge the most for.
?What is the cheapest way to build outdoor kitchen counters?
Pour your own concrete. A bag of standard concrete mix runs about $5 to $7, so even a large counter costs under $40 in materials, against hundreds for a pre-made slab. Build a simple melamine form, pour and smooth the mix, cure it for 48 hours, and seal it. The result is tough and has a modern look that reads far more expensive than it cost.
?Can you build an outdoor kitchen without plumbing or gas lines?
Yes, and most budget builds do. Use charcoal, a portable propane grill, or a salvaged drum for cooking, and a tub-and-camping-faucet rinse station fed by a garden hose for water, with a bucket catching the graywater. That covers everyday cooking and cleanup with no permanent utilities. For a hard-plumbed sink or a gas line, bring in a licensed pro to handle it safely.
?What materials hold up outdoors on a budget?
Cinder block, concrete, galvanized metal, real hardwood, and pressure-treated or sealed lumber all survive outside for little money. Avoid particleboard, untreated wood, and indoor paint, which fail within a season. Whatever you use, seal it, exterior paint, outdoor stain, or marine varnish on wood, and a concrete sealer on counters, since the sealing step is what turns a cheap build into a lasting one.
Build the Bones, Spend on the Cooking
A great outdoor kitchen comes down to the build more than the budget. Dry-stack the blocks, pour the counter, salvage the dresser, and rig the sink, and you end up with a real cook space for a few hundred dollars and a handful of weekends. Put the money you save where it counts, into a grill and a smoker you will use for years.
Start with the layout and one project, maybe the cinder-block grill station, and let the kitchen grow from there as you find the next free pallet or thrift-store find. Bookmark this list so the hacks are handy when the materials turn up, and before long the backyard becomes the spot everyone gathers, built mostly by your own hands.


