The myth about an outdoor BBQ kitchen is that it means a sprawling, ten-thousand-dollar built-in with a pizza oven and a kegerator. For a serious build, sure. But plenty of the best grill setups are a smart cart, a compact corner, or a simple stone counter that costs a fraction of that. The wow is in the setup, not the price tag.
What every great outdoor BBQ kitchen has in common is good planning: the right grill, prep space on both sides, weatherproof materials, and a layout that keeps the cook in the party. Below are setups for every yard and budget, from a flexible grill cart to a sheltered pavilion, with the real costs and trade-offs grill lovers should know.
Before You Build
- An outdoor BBQ kitchen can be a $300 grill cart or a $20,000 built-in island; match the setup to your budget and how you cook.
- Build for the weather: stainless, stone, and a roof or pergola keep an outdoor kitchen working for years.
- Plan the grill, the prep space, and the storage as a unit, with counter on both sides of the grill.
- Decide on fuel first, gas for convenience, charcoal or a smoker for flavor, since it shapes the whole build.
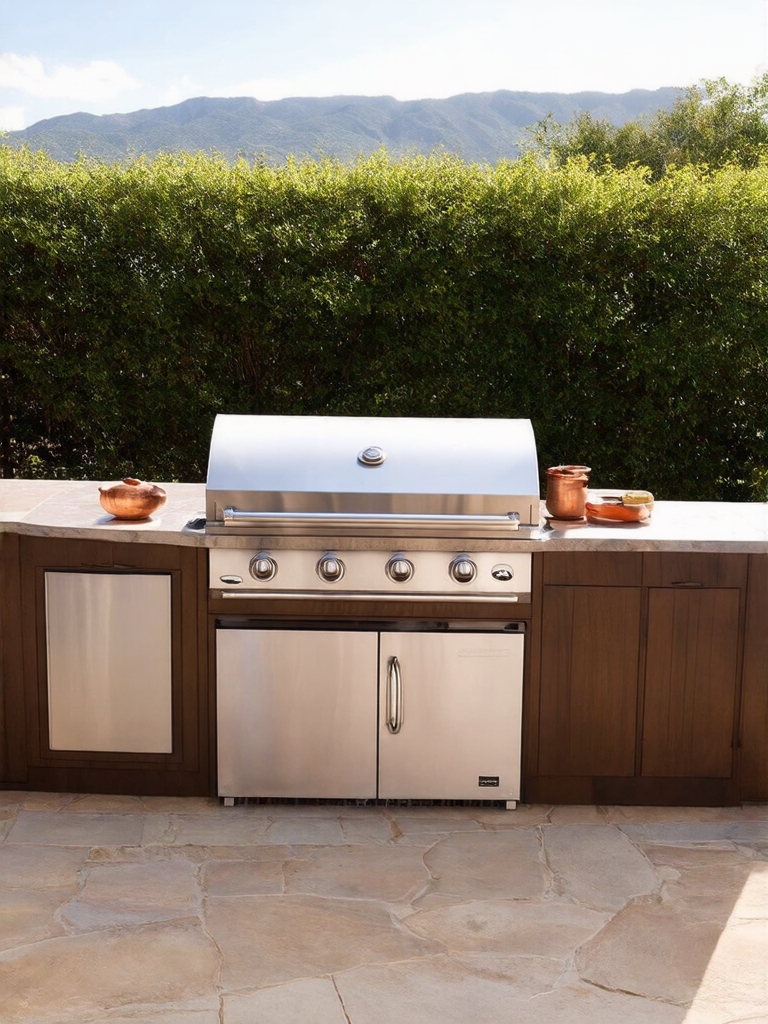
Start With a Built-In BBQ Island

The built-in BBQ island is the dream setup: a permanent masonry or framed island with the grill dropped in, counter space on both sides, storage below, and often a side burner or sink. It anchors the yard like a kitchen island anchors a room, and it adds real value to a home.
The key is planning the layout before you build. Leave at least 24 inches of counter on each side of the grill for prep and plating, build in storage and a trash pull-out, and run a gas line if you want the convenience of natural gas.
A full built-in island runs roughly $5,000 to $20,000 depending on size and finishes, so it is an investment, but it is the setup that turns a backyard into an outdoor room, much like the best backyard outdoor kitchen spaces.
- Leave at least 24 inches of counter on each side of the grill.
- Build in storage, a trash pull-out, and ideally a side burner.
- Run a gas line if you want the ease of natural gas over propane.
Convert Your Deck Into a BBQ Haven

If you have a deck, you already have the bones of an outdoor BBQ kitchen. A deck setup usually means a freestanding or built-in grill, a run of weatherproof counter or a prep cart, and a dining spot, all arranged so the cook faces the gathering. The deck gives you a level, finished surface to build on.
Decks come with a few rules. Keep the grill well clear of the house and the railing, put a grill mat under it to protect the boards from grease and sparks, and check that the deck can carry the weight of a heavy built-in before you commit. On a wood deck, I recommend a freestanding grill or cart over a masonry island, since it is the safer and simpler choice.
Build the deck kitchen for the view and the flow. Position the grill and counter so the cook looks out over the yard or the gathering, add some shade and lighting for evening cookouts, and keep a clear path between the grill and the indoor kitchen for carrying food. A deck makes one of the easiest outdoor kitchen upgrades there is.
A great outdoor kitchen is just a good indoor kitchen that learned to handle the weather.
A BBQ Corner for a Compact Patio

Not every yard has room for a sprawling setup, and a compact BBQ corner proves you do not need one. Tuck a grill and a slim counter into a corner of a small patio, add a narrow run of cabinetry or a bar cart for prep and storage, and you have a complete little outdoor kitchen in a few square feet. An L-shaped corner uses the space efficiently and gives you counter on two sides.
Keep it tight and functional. A compact grill or a built-in two-burner, a small weatherproof counter, a couple of shelves or a cabinet, and wall-mounted tool hooks make the most of a corner. Vertical storage and fold-down surfaces stretch a tiny footprint, so even a balcony or a courtyard can host a real grill setup, much like clever small outdoor kitchen layouts.
A Luxurious Outdoor Cooking Space Under a Pergola

For the full outdoor-kitchen experience, build under a pergola or a covered structure. The shade and shelter let you cook and entertain in sun or light rain, and the overhead structure makes the space feel like an actual room. A pergola setup usually pairs a built-in grill island with a dining area, lighting, and sometimes a ceiling fan or heaters.
Going luxe means adding the extras that earn their keep. A side burner, a built-in smoker or pizza oven, a sink with running water, an outdoor fridge, and a bar with seating turn a grill into a true second kitchen. Plan utilities early, since gas, water, and power are far cheaper to run during the build than to add later.
Shelter changes what you can do. Under cover, you can use more electronics, hang lighting, and leave nicer materials out, and the space works in far more weather. A pergola or roof is one of the highest-impact upgrades for an outdoor kitchen, much like the best covered outdoor kitchen designs.
A few outdoor-kitchen terms.
📖BTU
British thermal units, a grill’s heat output. More is not always better, but very low BTU struggles to sear.
📖Side burner
An extra gas burner beside the grill for sauces, sides, and boiling, so you are not running inside.
📖Hardscape
The built, non-plant parts of a yard, patios, walls, counters, that an outdoor kitchen sits on.
A Rustic Fieldstone BBQ Foundation

A BBQ station built from natural stone has a timeless, rooted look that manufactured materials cannot match. Fieldstone, flagstone, or local rock around a grill and counter gives the setup the feel of something that has always been there, and it ages beautifully in the weather. The stone is also tough, fireproof, and low-maintenance once it is built.
Set masonry on a proper footing
Stone is a bigger build, so plan it carefully. I tell clients a masonry base needs a solid footing, ideally a concrete pad, so it does not shift or crack with frost and time. Cap it with a durable granite or concrete counter that handles heat and weather, and leave openings for storage or a fridge below.
Match the stone to your house and yard for a setup that looks intentional. Local stone ties the kitchen to its surroundings, while a honed granite or soapstone top keeps it practical. A stone BBQ station is the most permanent, characterful setup there is, and the one most likely to outlast every trend.
A Sleek, Functional Outdoor Kitchen

For a contemporary home, a sleek outdoor kitchen mirrors the clean lines of a modern indoor one. Think a low-profile stainless or concrete island, handleless cabinets rated for the outdoors, a flush built-in grill, and a minimal, monochrome palette. The look is crisp, architectural, and built to handle the elements without fuss.
Sleek does not mean less functional. Hide the storage behind flat doors, integrate the grill and side burner into one clean run, and use stainless or porcelain surfaces that wipe clean and shrug off weather. Keep the materials tough, marine-grade stainless, porcelain, concrete, sealed teak, so the modern look lasts through real seasons of cooking.
- Choose a low-profile island in stainless, concrete, or porcelain.
- Use handleless, outdoor-rated cabinets for a clean, flush look.
- Stick to tough, weatherproof materials so the sleek look lasts.
Heads-Up
Anything with a flame needs clearance and ventilation, even outdoors. Keep a built-in grill the manufacturer’s required distance from combustible walls and overhangs, never enclose a propane tank in a sealed cabinet since gas can pool, and make sure a covered setup has enough open airflow to vent smoke and fumes.
A Flexible Outdoor Cooking Cart

Not ready to build anything permanent? A quality grill cart or a rolling kitchen island gives you a real setup with zero construction. I love a grill cart as the easiest no-build way in. A freestanding grill with side shelves, plus a rolling cart for prep and storage, lets you cook anywhere and roll it out of the way or under cover when you are done. It is the renter’s and the budget’s best friend.
Flexibility is the whole appeal. You can start with a cart and a grill for a few hundred dollars, add a prep table and storage as you go, and rearrange the whole setup for a party or a small patio. A good grill cart runs $150 to $600, and it is the easiest way to test how you actually cook outdoors before committing to a built-in, the same low-risk logic behind simple outdoor kitchen layouts.
- Pair a freestanding grill with a rolling prep-and-storage cart.
- Start cheap and add pieces as you learn how you cook outside.
- Roll it under cover or out of the way when you are done.
A Poolside BBQ Bar

A BBQ bar by the pool turns grilling into the center of summer entertaining. Set a grill and a bar counter with stools near the pool, so the cook can serve drinks and food while no one has to leave the water for long. The setup pairs a built-in or freestanding grill with a raised bar, a few weatherproof stools, and storage for towels, drinks, and grill tools.
Keep it splash-smart: choose rust-proof stainless and stone that handle pool chemicals and constant moisture, and set electrical outlets and any fridge a safe distance from the water. Add shade and good lighting, and a poolside bar becomes the spot everyone gathers all season. It is the setup that makes a backyard feel like a resort, the kind of wow behind outdoor kitchen design layouts worth copying.
- Set a grill and a bar counter with stools near the pool.
- Choose rust-proof materials that handle chlorine and moisture.
- Keep outlets and any fridge a safe distance from the water.
The Culinary Command Center

For the grill lover who wants it all, the command-center setup integrates every cooking method in one place. A main grill, a smoker, a side burner, maybe a pizza oven and a flat-top griddle, all in a single island or L-shaped run, so you can sear, smoke, and bake all in one spot. It is the outdoor kitchen for someone who truly loves to cook.
Zone it like a pro kitchen. Group the high-heat cooking together, keep a generous prep zone with a sink and counter, and build in cold storage and a trash spot so everything you need is within a step. Good organization is what keeps a big setup from becoming a cluttered mess.
This is a serious investment, often the cost of a small indoor remodel, so build it for how you actually cook. If you smoke every weekend, prioritize the smoker and its fuel storage; if you host big, prioritize prep space and seating. The best command center is tailored to its cook, not stuffed with gadgets you will never use.
Shelter It With a BBQ Pavilion

A pavilion or a roofed structure is what makes an outdoor kitchen usable in almost any weather and protects the investment underneath it. A solid roof keeps sun, rain, and falling leaves off the grill and counters, extends the cooking season well into spring and fall, and lets you use lighting, fans, and heaters comfortably. It turns a fair-weather setup into a year-round one.
Build the pavilion with ventilation in mind. Smoke and heat need somewhere to go, so a vented roof, a cupola, or generous open sides keep the air moving and the space comfortable. Pair the shelter with proper outdoor lighting and a fan or two, and the pavilion becomes the most-used room in the house for half the year, the kind of upgrade that protects everything you spent on the kitchen below.
What to Expect
Building an outdoor BBQ kitchen is mostly about matching the setup to your real habits and budget. Expect a grill cart or compact corner to run a few hundred to a couple thousand dollars and go in over a weekend, while a built-in island with utilities is a multi-thousand-dollar project that often needs a contractor, a gas fitter, and an electrician.
Decide your fuel and your must-have features first, since gas lines, water, and power are far cheaper to plan in than to add later.
Plan for the weather and the upkeep too. Outdoor kitchens take a beating from sun, rain, and temperature swings, so invest in weatherproof materials, marine-grade stainless, sealed stone, outdoor-rated cabinets, and cover or shelter what you can.
Expect to preheat the grill 10 to 15 minutes before cooking, clean it after each use, and deep-clean and re-season surfaces a couple of times a season. Build it tough and shelter it well, and an outdoor kitchen pays you back in cookouts for years.
Outdoor BBQ Kitchen Questions, Answered
?How much does an outdoor BBQ kitchen cost?
Anywhere from a few hundred dollars to over twenty thousand. A quality grill cart setup runs $150 to $600, a compact built-in corner a few thousand, and a full built-in island with a gas line, sink, and premium appliances $5,000 to $20,000 or more. The fuel, the materials, and whether you run utilities drive most of the cost, so set a budget before you fall for a showroom island.
?What materials hold up best in an outdoor kitchen?
Marine-grade (316) stainless steel, natural or engineered stone, concrete, porcelain, and outdoor-rated cabinetry all handle weather, heat, and moisture. Avoid indoor cabinets, untreated wood, and cheap stainless that rusts. Cap the counters in granite, soapstone, or concrete that take heat, and seal any natural stone. The tougher the materials, the less the weather costs you over time.
?Gas or charcoal for an outdoor kitchen?
It depends on how you cook. Gas, especially a natural-gas line, is the most convenient: instant heat, easy control, no fuel runs. Charcoal and wood deliver more flavor and high-heat searing but take longer and need more cleanup. Many serious setups include both, a gas grill for weeknights and a charcoal grill or smoker for weekends, so you do not have to choose.
?Do I need a roof over my outdoor kitchen?
Not required, but a roof or pergola pays off. Shelter extends the cooking season, protects the grill and counters from sun and rain, and lets you use lighting, fans, and nicer materials. If you cannot cover the whole space, at least shelter the grill and store or cover the appliances. Just make sure any covered setup has enough ventilation to vent smoke and heat safely.
Build the Setup That Fits Your Fire
The best outdoor BBQ kitchen is not the biggest or the most expensive; it is the one that fits how you grill. A flexible cart, a compact corner, a stone station, a sheltered command center, each is a great setup for the right cook and the right yard. Match the grill and the build to your budget, your space, and the way you actually cook, plan the prep space and weatherproofing from the start, and you will use it constantly.
Whether you are a weekend burger flipper or a low-and-slow smoker obsessive, there is a setup that turns your backyard into the best seat in the house. Start with the grill and the fuel, build out the prep, storage, and shelter around it, and let the cookouts take it from there. A good outdoor kitchen is the rare home upgrade that pulls everyone outside and keeps them there.


