The kitchen that made me a believer belonged to a 1970s split-level with mustard laminate and oak cabinets so orange they practically glowed. A gut renovation was off the table, so we painted the lower cabinets a deep olive, left the uppers alone, and spent forty dollars on brass knobs. Two weekends later it read like a different house.
That is the quiet trick green cabinets pull off. They take a kitchen most people would gut and make it feel intentional, usually for the price of paint, primer, and patience. The makeovers below run the full range, from barely-there sage to inky emerald, and almost every one started with cabinets the owner had already half-decided to rip out.
What to Know Before You Commit
- A quality DIY cabinet repaint runs $200 to $600 in materials, a fraction of what new boxes cost.
- Lighter greens like sage and mint open up a small kitchen; deep emerald and hunter need real light plus white or wood to keep them from going cave-dark.
- Hardware does the heavy lifting on a budget. Swapping pulls for brass, matte black, or brushed nickel resets the whole look for under $100.
- Two-tone, green on the bottom and white or wood on top, is the lowest-risk way to test the color before you paint everything.
Sage Green: The Forgiving Transformation

If you only try one shade, start with sage. It is the green that behaves like a neutral, which is exactly why it rescues so many sterile white kitchens. The gray undertone keeps it muted and easy, so it sits quietly next to stainless steel, white quartz, and warm wood without picking a fight with any of them.
Who It Works For
Sage is also the most forgiving color to apply yourself. Mid-tone greens hide a brush mark or a slightly uneven wall far better than a dark emerald will, and since a coat dries to the touch in about an hour, a careful painter can finish a small kitchen over two weekends. I usually steer first-timers here for that reason alone.
The honest catch is that sage shifts under bad lighting. Under warm yellow bulbs it can drift toward drab olive, so test a sample door in your actual kitchen at night before you buy three quarts of it.
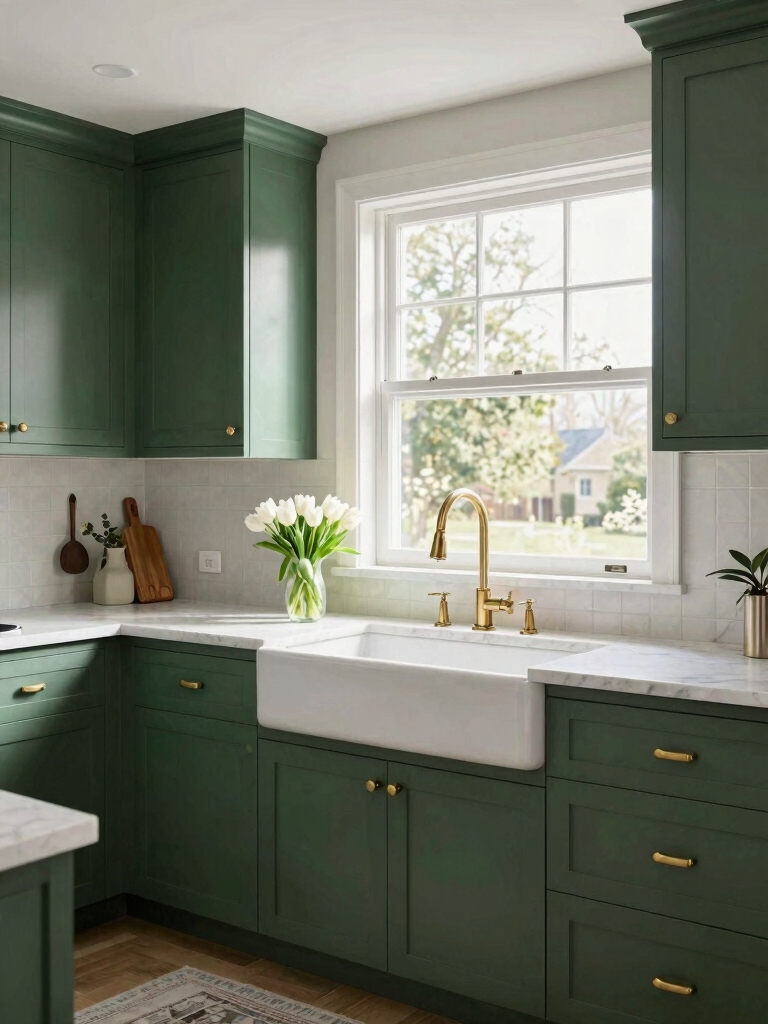
Deep Emerald Elegance Without a Remodel

Emerald is the shade that convinces people you spent more than you did. There is a jewel-box richness to it that photographs like a designer kitchen, and it does that work even in a small galley. The color carries the room, so your counters and backsplash can stay plain.
Pairing Notes
It rewards restraint everywhere else. Pair emerald with unlacquered brass that will patina over a year, a simple white or pale marble-look counter, and warm bulbs, and you land somewhere between the greens that look truly expensive and a historic brownstone. Keep the rest of the palette loud and it tips into busy fast.
Emerald is the least beginner-friendly green to spray or brush, because the depth of pigment shows every flaw. If you have ten-foot runs of cabinetry, this is the color I would most likely hand to a pro.
A weekend plan for repainting cabinets sage green without spray equipment.
1Strip and clean
Remove the doors, label the hinges, and scrub everything with a degreaser. This single step prevents most peeling failures down the road.
2Sand and prime
Scuff-sand the surfaces, wipe the dust, and roll on a bonding primer. Tinting the primer gray-green means fewer topcoats later.
3Two thin coats
Brush cut-ins, then roll the flats with two thin coats of cabinet enamel. Give each coat a couple of hours to cure, and leave the doors overnight before rehanging.
Olive Green Warms a Farmhouse Kitchen

Olive is the green for people who find sage too cool and emerald too formal. It has a brown, almost military earthiness that loves natural materials, which is why it feels so at home in a farmhouse kitchen built around butcher block, open shelving, and a few thrifted pieces.
- Counter it with butcher block or a warm wood tone rather than gray quartz, which fights the brown undertone and makes the olive look muddy.
- Reach for aged or oil-rubbed bronze hardware over chrome. The warmth matches; the cool metal does not.
- Olive is one of the best greens for hiding everyday wear, so it suits a busy family kitchen where a pristine finish was never realistic.
Mint Green for a Fresh Cottage Look

Mint is the most underused green on this list, probably because people fear it will look like a 1950s diner. Used with a light hand it does the opposite. It carries a gentle, retro freshness that makes a dated cottage kitchen feel deliberate again, and it bounces light beautifully in a room with even one decent window.
Keep the rest of the space quiet to let mint stay charming instead of cute. Whitewashed floors, simple shaker doors, and a woven runner are plenty. If you want the color without repainting every door, a single mint island against white perimeter cabinets is the safest way in, and you can always commit to a fuller two-tone treatment later.
| Green shade | Best counter | Hardware that flatters |
|---|---|---|
| Sage | White quartz or warm wood | Brass or brushed nickel |
| Olive | Butcher block | Oil-rubbed bronze |
| Emerald | Pale marble-look | Unlacquered brass |
| Hunter | Soapstone or black | Matte black |
Forest Green Two-Tone Kitchen Designs

Two-tone is the makeover I recommend most to nervous clients, because it lets you have a bold green kitchen without surrounding yourself with it. Forest green on the lowers grounds the room while crisp white or warm wood uppers keep everything at eye level airy. You get the drama at the floor and breathing room at the top.
The detail that makes or breaks it is the hardware, because it has to bridge two very different colors. The combinations below keep both halves looking pulled together.
- Matte black pulls on both the green and the white tie the two halves together with the least effort.
- Brushed nickel is the safe middle path if your appliances are already stainless.
- Skip mixing finishes on a two-tone job; one metal everywhere keeps the eye calm.
Sage Green and Brass Hardware Details

There is a reason this pairing shows up in half the green kitchens people pin. Soft sage is cool and quiet; brass is warm and a little glamorous. Put them together and the brass keeps the sage from reading flat or institutional, while the sage keeps the brass from looking flashy. It is an easy win that punches above its cost.
You do not need solid brass to get there, either. The look is mostly about warmth and finish, so a few smart choices stretch a small budget a long way.
- Unlacquered brass develops a living patina; lacquered brass stays bright and uniform. Pick based on whether you want it to age.
- A full set of pulls and knobs for an average kitchen runs roughly $80 to $150 in budget brass-finish hardware.
- Carry the brass into one more spot, a faucet or a pendant, so it registers as a deliberate choice.
The fears that talk people out of green, and what actually happens.
❌ Myth: Green cabinets will go out of style in two years
✅ Reality: Muted greens have behaved like neutrals for decades. Trend-chasing brights date fast; sage and olive do not.
❌ Myth: A dark green will make my kitchen feel smaller
✅ Reality: Light, not color, drives that. A deep green in a well-lit room with pale upper cabinets can feel cozy rather than cramped.
❌ Myth: I need new cabinets to change the color
✅ Reality: If the boxes are sound, a repaint gets you a new color for a fraction of replacement, hardware included.
Green Lowers and White Uppers in Harmony

This is the most resale-friendly green makeover, and the one you can do in stages if money is tight. Green below, white above anchors the room without committing your whole kitchen to color, which matters if you might sell in a few years. Here is the order I would tackle it in.
- Paint the lowers first. They take the most abuse and benefit most from a durable repaint, so your money does its hardest work here.
- Live with the white upper cabinets as they are for a month before deciding whether they need a refresh too.
- Swap all the hardware last, once both colors are set, so the metal you choose flatters the finished pair with no guesswork.
Hunter Green in Open-Concept Kitchens

Open-concept kitchens have a specific problem: with no walls to contain them, they can feel like a pale blur that runs into the living room. Hunter green fixes that. The depth gives the kitchen a clear anchor, a visual home base that still feels like a room even when there is no doorway, and it does it without the heaviness of black.
Because the cabinets will be visible from your sofa, they have to relate to the rest of the space, not just the kitchen.
- Repeat the green somewhere in the adjoining room, even just a throw pillow or a book spine, so the kitchen feels connected.
- Hunter needs light. In a north-facing or dim open plan, add under-cabinet LED strips before you commit, or it will swallow the corner.
- If hunter feels like too much, rethinking green as your new neutral with a grayer shade gets you most of the anchor with less weight.
Soft Green With Natural Wood Accents

Pairing a muted green with raw or lightly finished wood is the most reliable way to make a kitchen feel calm instead of clinical. The green brings the cool; the wood brings the warmth, and the contrast in temperature is what comes across as organic and considered. It is the look that makes people say a kitchen feels expensive without being able to say why.
Where to Add the Wood
The wood does not need to be expensive to do this. A wood-toned floating shelf, a butcher block section of counter, or even a cutting board left out on the run is enough to start the conversation between the two materials.
Keep the wood tones in the same family. A honey oak shelf and a cool gray-brown floor will read as a mismatch, so pull a sample before you buy and check them side by side in your own light.
How Green Cabinets Open Up a Small Kitchen

The biggest myth about color in a small kitchen is that you have to stay white to keep it open. The right green does the opposite of crowd a room. Soft sage and mint recede visually, which makes the walls feel a step farther away, and pairing them with white uppers keeps the upper half of the room bright where it counts most.
Where small kitchens go wrong is in going too deep without enough light. Save the emerald and hunter for rooms with real windows, and if you fall for a dark shade in a dim galley, confine it to an island or a single run so it accents the space and keeps the rest open. For more on the budget end of all this, the ideas that make green cabinets steal the show hold up in tight footprints too.
What a Green Cabinet Makeover Actually Costs
The reason green makeovers spread so fast is the math. Replacing cabinet boxes in an average kitchen starts around $4,000 and climbs quickly with custom work. A repaint of the doors and frames you already have lands in a completely different universe, which is why the same homeowners who balk at a remodel will happily spend a weekend with a brush.
Here is roughly where the dollars go on a do-it-yourself green repaint, before any new counters or backsplash.
- Paint, primer, and a quality brush or mini-roller: $120 to $250, depending on whether you buy cabinet-grade enamel.
- Degreaser, sandpaper, painter’s tape, and drop cloths: another $40 to $80 in supplies people always forget to budget.
- New hardware, the upgrade with the biggest visible payoff: $80 to $200 for an average kitchen.
- If you hire a pro to spray instead, expect roughly $1,500 to $4,000 in labor and materials, still well under replacement, and worth it for deep shades that show every brush mark.
Green Cabinet Mistakes That Cheapen the Look
I have seen beautiful green kitchens undercut by a handful of avoidable choices. Most of them cost almost nothing to get right if you catch them before the brush comes out.
- Skipping primer and degreaser. Kitchen cabinets carry years of cooking film, and paint that peels in six months is the fastest way to make a makeover look cheap.
- Cheap plastic pulls on a real paint job. You did the hard part; do not finish it with hardware that feels hollow in the hand.
- Pairing a muddy green with warm yellow lighting, which sours the color. Switch to a neutral bulb around 3000K and the green snaps back to life.
- Ignoring the backsplash. A busy patterned tile will fight the cabinets for attention, so let one of them be the quiet one.
Start With Paint, Not Demolition
What ties these sixteen makeovers together is not a single shade of green. It is the order of operations. Almost every one started with cabinets the owner nearly replaced, and ended with paint, the right hardware, and a little patience instead. The color you pick matters less than matching it to your light, your counters, and how much you actually want to live inside it.
So before you price out new boxes, pull a sample door, paint it the green you keep coming back to, and tape it up in your own kitchen for a few evenings. Which shade still feels right after dinner, when the lights are low and the room is yours?


