

Open concept gets sold as automatically better, but a knocked-down wall does not create flow on its own. What actually makes an open concept kitchen work is a short list of essentials, the layout, the island, the storage, the materials, working together so the space feels connected instead of chaotic. Get those right and the openness pays off. Get them wrong and you have a big room that fights you at every meal.
This is the honest, build-it version: the elements that matter most for flow, what to spend on, and where the common mistakes hide. None of it is complicated, but the order and the choices add up. Here are the essentials I come back to on every open kitchen, whether it is a full renovation or a smarter way to use the space you already have.
The Essentials in Order
- Start with the layout: an L- or U-shape with a central island keeps traffic clear and the cook facing the room.
- Define zones with rugs, lighting, and the island so the space stays open but still legible.
- Spend on durable, low-maintenance materials like quartz counters and vinyl or sealed wood floors, since everything is on display and in use.
- Control clutter and noise with closed storage, quiet appliances, and soft surfaces; an open kitchen forgives nothing.
Why an Open Kitchen Wins on Connectivity

The reason open kitchens took over is simple: they connect the cook to everyone else. Instead of standing walled off, you are part of the conversation, the homework, and the party while you work, and natural light travels farther without partitions to stop it.
That connectivity is the real payoff, and it is why the layout keeps winning even after years of popularity. The honest flip side is that connection carries sound, smell, and mess too, which is exactly why the essentials below matter so much.
- Sightlines to the living and dining areas keep the cook social.
- Borrowed light makes the whole floor feel brighter and larger.
- Shared space makes it easier to watch kids and host guests.
Layouts That Maximize Space in Open Kitchens

Layout is the first essential and the hardest to change later, so it earns the most thought. In an open kitchen, an L-shape or U-shape with a central island uses corners efficiently and keeps the cooking zone out of the main traffic path. A galley-plus-island works well in narrower spaces, and you can borrow ideas from open kitchen layouts built for modern living.
The numbers that matter are the walkways. Keep main aisles at least 42 to 48 inches in a kitchen two people share, and never let the island crowd the work triangle between sink, stove, and fridge. I have seen beautiful islands installed too big, choking the very flow they were meant to add.
- An L- or U-shape with an island suits most open kitchens.
- Keep working aisles 42 to 48 inches wide for two cooks.
- Size the island to the room, leaving clear paths on all sides.
| Factor | Open concept | Closed kitchen |
|---|---|---|
| Sociability | High; the cook joins the room | Lower; the cook is separated |
| Noise and smell | Travels everywhere | Contained behind a wall |
| Clutter | Always on display | Easy to hide |
| Resale appeal | Strong with most buyers | Niche, but some prefer it |
Defining Spaces Without Walls

Once the kitchen is open, you need a way to tell where it ends. The essential tools are subtle: an area rug to ground the dining or living zone, a change in lighting overhead, the island acting as a built-in border, and sometimes a small step or ceiling change. Using two or three of these together signals separate areas while keeping the airy feel.
The mistake is using none, which leaves a furniture-showroom blur, or piling on too many, which quietly rebuilds the walls you just removed. The same toolkit drives the best partition ideas that skip the walls.
- Rugs are the cheapest, fastest zone marker, roughly $150 to $500.
- Let the island do double duty as the kitchen’s edge.
- A pendant or different fixture overhead quietly signals a new zone.
Choosing a Functional, Stylish Kitchen Island

If one piece makes or breaks an open kitchen, it is the island. It is the prep surface, the casual seating, the storage, and the visual border between cooking and living all at once. When I plan one, size and clearance come before looks: at least 36 to 42 inches of clear floor around it, and enough overhang, about 12 inches, for stools to tuck under comfortably. Smaller rooms can still get there with clever small kitchen island ideas.
Build storage into every side you can, and decide early whether it carries a sink or cooktop, since that drives plumbing and ventilation. A waterfall stone end looks high-end but adds real cost; a simple painted base with a butcher-block top gives warmth for far less. Either way, the island should serve the flow, not just fill the middle of the room.
👍Open zoning works when
- +You use a couple of subtle cues, like a rug plus a pendant
- +The island anchors the kitchen’s edge
- +Rugs and lighting do the dividing
👎It backfires when
- –The space has zero definition and feels like a showroom
- –You over-divide and lose the open feeling
- –Furniture floats undersized in the middle
Versatile, Multi-Use Furniture

Beyond the island, the furniture in an open kitchen has to work harder because it is always in view and often does two jobs. Extendable dining tables, storage benches, nesting stools, and counter-height tables that double as prep space all keep the room flexible for cooking, eating, and gathering without crowding it. Each piece pulls double duty.
I tell clients the rule is fewer, better pieces. In an open plan, a clutter of small furniture reads busier than one or two well-scaled pieces, and it blocks the sightlines that make the space feel large. Choose items with legs and lighter visual weight so the eye, and the light, can pass underneath.
Smart Storage That Hides the Clutter

Storage is the essential that keeps an open kitchen livable, because in a connected space there is no door to close on the mess. The move is to maximize closed and vertical storage: full-height pantry cabinets, deep drawers in place of low shelves, island storage on every side, and a designated home for the small appliances that otherwise colonize the counter.
I tell clients to plan storage for the clutter they actually have, not the tidy kitchen they imagine, the same honesty behind good small kitchen storage ideas.
- Trade open shelves for closed cabinets where you can, to hide daily mess.
- Use full-height cabinetry to claim the vertical space.
- Give counter-hogging gadgets a dedicated cabinet or appliance garage.
📋Open-Kitchen Storage Checklist
- ✓Full-height pantry or tall cabinets
- ✓Deep drawers over low shelving
- ✓Storage built into every island side
- ✓An appliance garage or cabinet for small gadgets
- ✓A drop-zone drawer near the entry
Appliances That Blend Into the Design
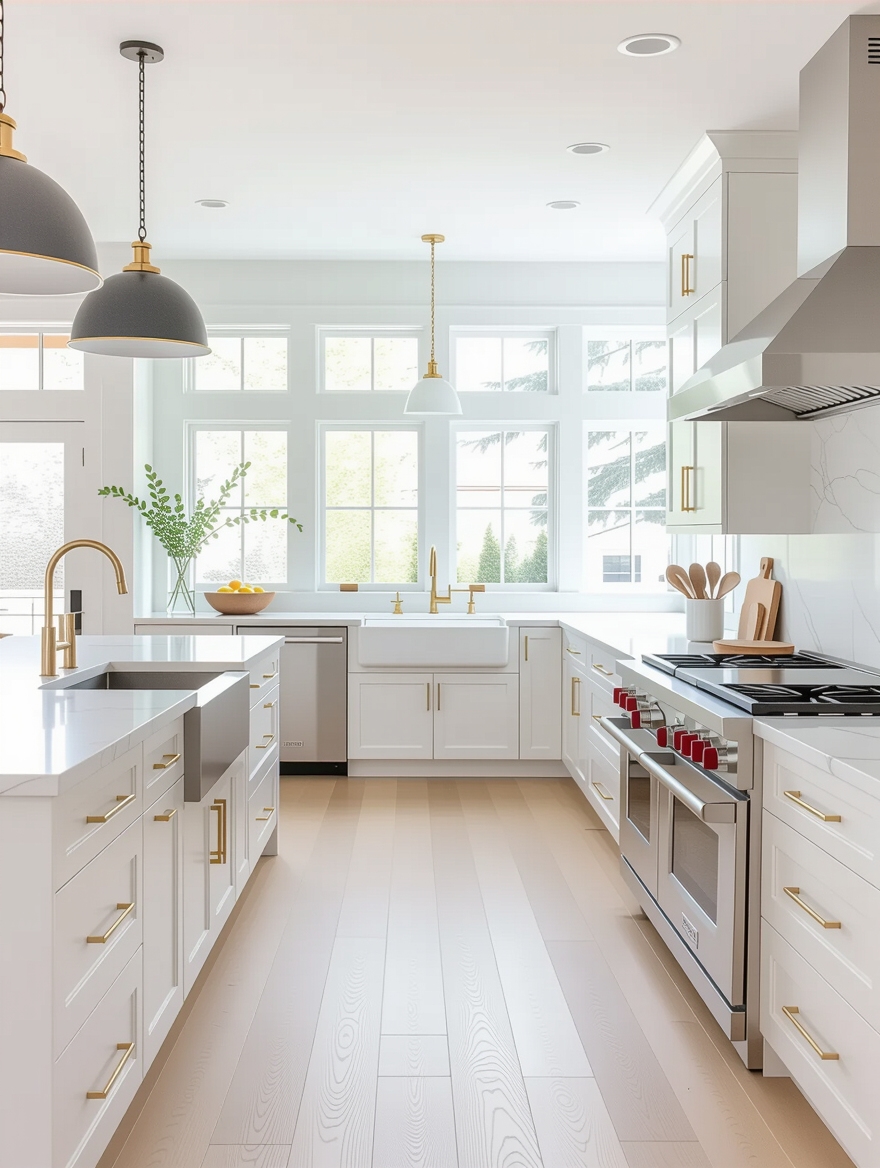
In a closed kitchen, appliances can be loud and obvious. In an open one, they are part of the living room’s view and earshot, so the essentials shift toward integrated and quiet. Panel-ready refrigerators and dishwashers that wear cabinet fronts, built-in or wall ovens, and a counter-depth fridge all keep the kitchen from shouting across the space.
Sound is the underrated factor here. Look for dishwashers rated around 44 decibels or lower and a range hood that actually vents outside, since you will hear and smell everything from the sofa. Slide-in ranges and minimalist controls keep the look calm. Stainless still works well, though matching cabinet panels disappear best of all.
Countertop Choices for Style and Durability

Counters sit front and center in an open kitchen, so they have to look good from the living room and survive daily life. Quartz is the workhorse I recommend most: durable, non-porous, low-maintenance, and available in nearly any look, usually $60 to $100 per square foot installed.
Granite brings natural character and shrugs off heat, but it needs periodic sealing. Butcher block adds warmth at a lower cost with more upkeep, and marble looks beautiful yet stains and etches, so it suits low-traffic spots more than a busy family island.
- Quartz: the best all-rounder, low-maintenance, widest range of looks.
- Granite or quartzite: natural and heat-tough, needs sealing.
- Butcher block or marble: warm or elegant, but plan for upkeep.
Durable Flooring and Smooth Transitions

Flooring ties an open kitchen to the rooms around it, so running one continuous material throughout is the cleanest move, both visually and practically. It enlarges the space and avoids the choppy thresholds that break up flow. I usually recommend luxury vinyl plank or sealed hardwood here, since they handle kitchen spills and living-room traffic equally well. Floors take the most abuse in the house.
If you do change materials, say tile in the kitchen and wood in the living zone, keep the transition flush and the tones related so it marks a zone without tripping anyone. For high-traffic open kitchens, porcelain tile and tough-finished hardwood hold up best. Whatever you pick, lay the planks in one direction across the whole floor for the smoothest run.
Lighting That Links the Kitchen and Living Zones

Lighting is the essential that quietly does the most, because in an open plan one ceiling fixture cannot serve cooking, eating, and lounging at once. The fix is layers: bright task light where you work, a feature fixture over the island or table, and softer lamps and dimmers in the living zone.
Keep bulb color consistent across the floor
Matching the style of fixtures across the zones is what links them visually, while their different jobs keep each area distinct. Under-cabinet strips handle prep, recessed cans fill in general light, and dimmers let the same space shift from bright cooking to low-key evening.
The number worth knowing is color temperature. Stick to a consistent warm white, roughly 2700K to 3000K, across the whole floor so the kitchen does not glow blue next to a cozy living room. Mismatched bulb tones are the fastest way to make one space feel like two.
Maintenance and Care for an Open Kitchen
Because everything sits in one connected space, upkeep in an open kitchen is really about keeping the whole room presentable at once. A strong, vented range hood is the single most important piece, since grease and odor otherwise settle on the sofa and curtains across the room. Quiet, well-sealed appliances and washable living-zone fabrics make the shared space easier to live with day to day.
The rest is routine but unforgiving: one cluttered counter is visible from every seat, so a daily five-minute reset and enough closed storage do more than any single upgrade. Choose forgiving finishes, matte or honed surfaces that hide crumbs and water spots, and your open kitchen will look pulled together with far less effort.
Flow Is Built, Not Knocked Out
Open concept will keep evolving, but the essentials behind real flow stay the same: a smart layout, a hardworking island, clear zones, durable materials, and lighting that ties it all together. Knocking out a wall is the easy part; making the space feel connected and calm is the work, and it is entirely doable with the right choices.
If you are planning an open kitchen or fixing one that feels off, bookmark this list and tackle it in order, layout first, finishes last. Each essential builds on the one before it, and getting the sequence right is what turns a big open room into a kitchen that finally flows. For more pairings to borrow from, the best open-plan kitchen and living room combos follow the same playbook.
More Hair Ideas


