
A green backsplash is the first thing your eye lands on when you walk into the kitchen. Glossy emerald tile catches the light. Soft sage zellige shows its handmade ripple. A wall of teal penny rounds looks almost wet. The cabinets set the stage, but the backsplash steals the scene.
It is also the lowest-risk way to add green to a kitchen. A backsplash is a small surface, so you can go bolder than you ever would on cabinets, and swap it years later without a full renovation. These 17 green backsplash combos show how to make that one wall the star, from barely-there mint to deep, dramatic forest.
Making a Green Backsplash Steal the Show
- A backsplash is the lowest-risk way to add green, since it is a small surface you can go bold on and redo far more easily than cabinets.
- Let the green wall be the one bold move and keep counters, cabinets, and floor calm so it stands out instead of competing.
- Match the tile to the mood, soft sage for calm, emerald or teal for drama, and mind the grout and sealing so it lasts.
Sage Green Backsplash With Oak
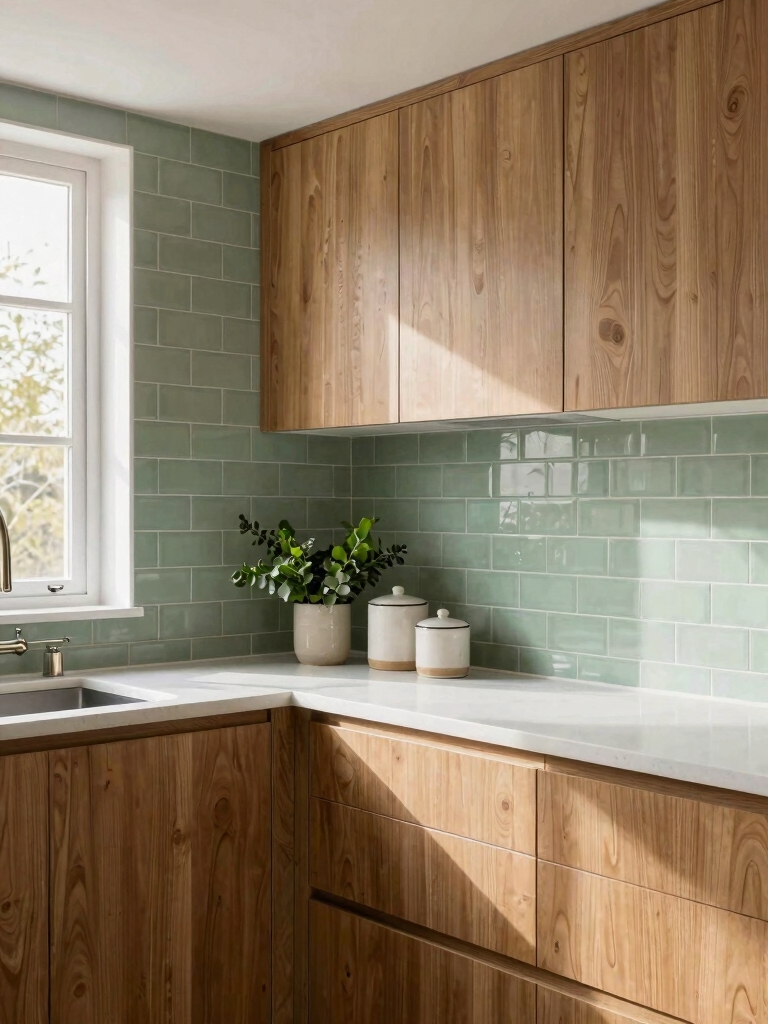
Start soft. The most foolproof green backsplash is soft sage against warm oak cabinets. Sage is gentle and gray-leaning, so it adds color without shouting, and the honey or white oak keeps the whole wall feeling warm and natural.
A sage subway or zellige tile behind oak looks calm and current at once. It is the green backsplash for people who want a hint of color, not a statement. Keep the grout close to the tile color so the wall stays soft, and let the oak grain do the rest of the talking.
- Pair a soft sage subway or zellige with warm oak cabinets.
- Choose a grout close to the tile color for a soft, quiet wall.
- Let the green stay gentle so the oak grain shares the spotlight.
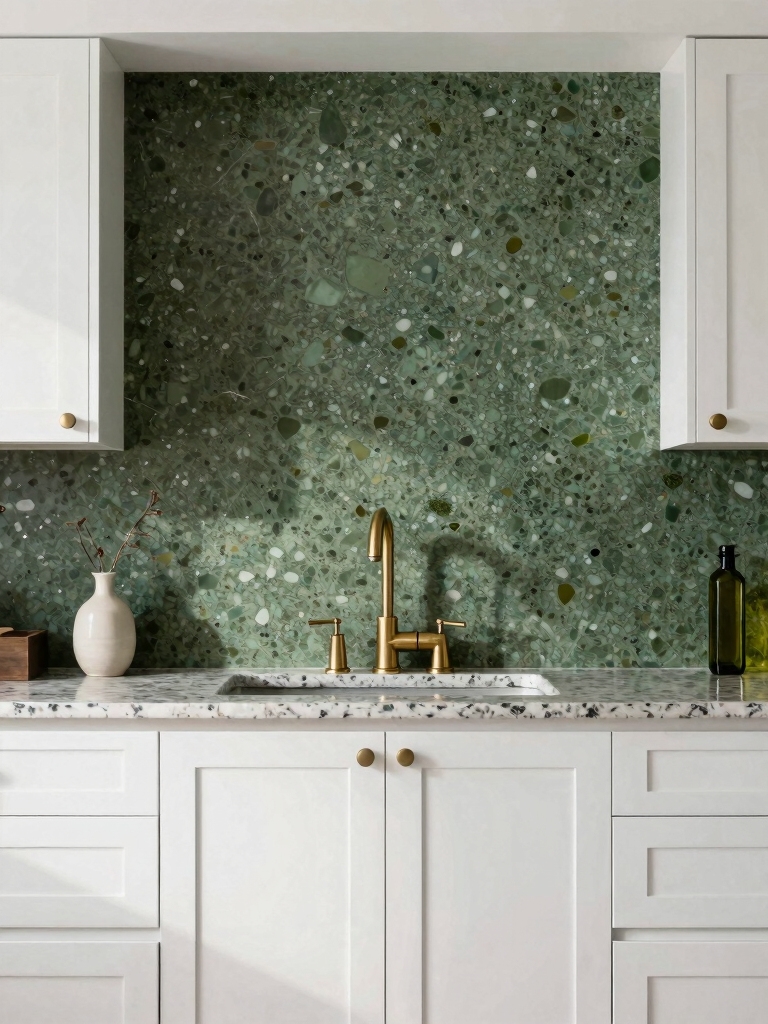
Countertops for Green Backsplashes
The counter under a green backsplash decides whether the green sings or sulks. A white or pale quartz is the safe, bright choice, letting the green tile be the star against a clean base.
For more warmth, a butcher block or a creamy stone softens a green backsplash and plays up its natural side. For drama, a black or dark soapstone counter makes an emerald or forest backsplash glow.
I tell people to bring a tile sample to the counter showroom, not the other way around, since the backsplash is the harder thing to change later. Match the counter to the mood you want, and let the green tile lead.
ℹ️Good to Know
A green backsplash counts as your one bold move, so the rest of the kitchen should stay calm. White or wood counters, simple cabinets, and a quiet floor give the green wall room to shine. Pile on a busy counter and a patterned floor too, and the green stops being the star and starts being noise.
Choosing a Green Backsplash Wisely
Before you fall for a tile, think about how permanent and how bold you want to go. A classic shape in a muted green will please you for decades. A trendy shape in a loud green might thrill you now and tire you fast.
Order samples and tape them up before committing, since green shifts dramatically with your light and your cabinets. A backsplash is harder and pricier to redo than paint, so it pays to be sure. The backsplash ideas that lift a room all start with a careful tile choice.
- Pick a classic shape in a muted green for a look that lasts.
- Order samples and tape them up in your own light first.
- Save the boldest greens for a small or easy-to-redo area.
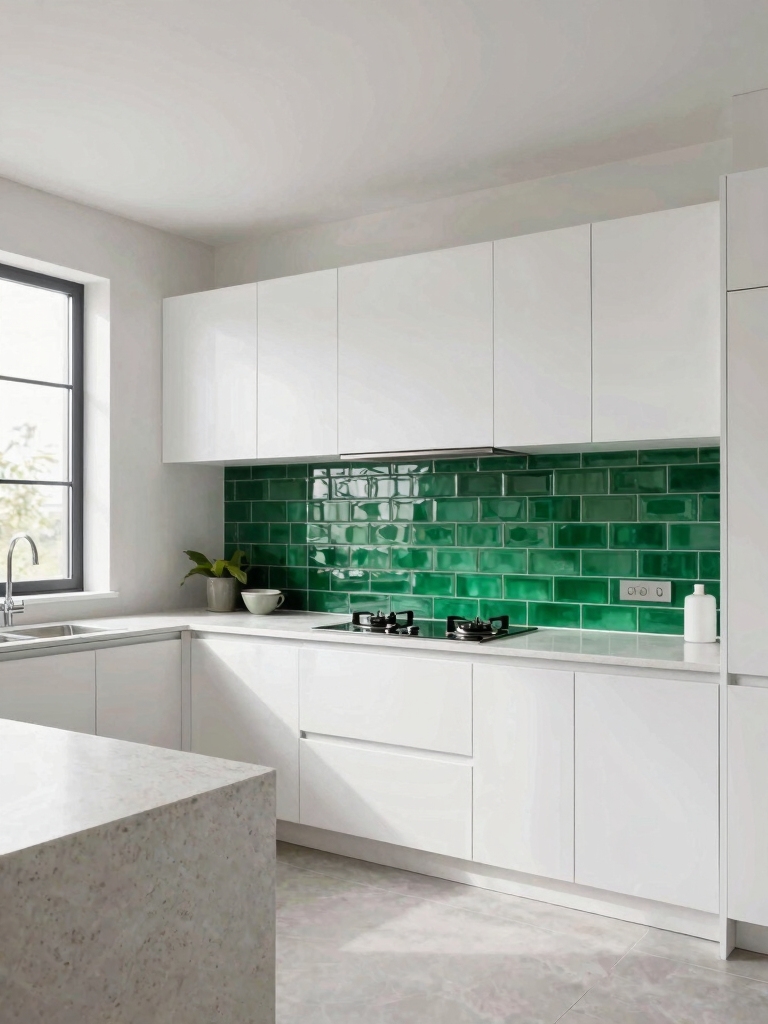
Bold Green Tile
If you want the backsplash to truly steal the show, go bold: a deep emerald, a rich forest, or a punchy kelly green across the whole wall. A saturated green backsplash turns a plain kitchen into a designed one in a single afternoon’s tiling.
Let the Color Lead
Bold green loves a simple shape so the color, not the pattern, leads. A glossy emerald subway or a flat slab of green marble makes a confident statement without fuss.
I love a bold green run all the way to the ceiling behind a range or open shelves, where it becomes a true feature wall. Keep everything around it quiet, and the green does all the work.
Pick a green tile for your style:
🎯Classic and calm
Sage or olive subway tile with soft, close-toned grout.
🎯Bold and modern
Glossy emerald subway or a green marble slab.
🎯Playful and textured
Mint glass, teal penny rounds, or green hexagons.
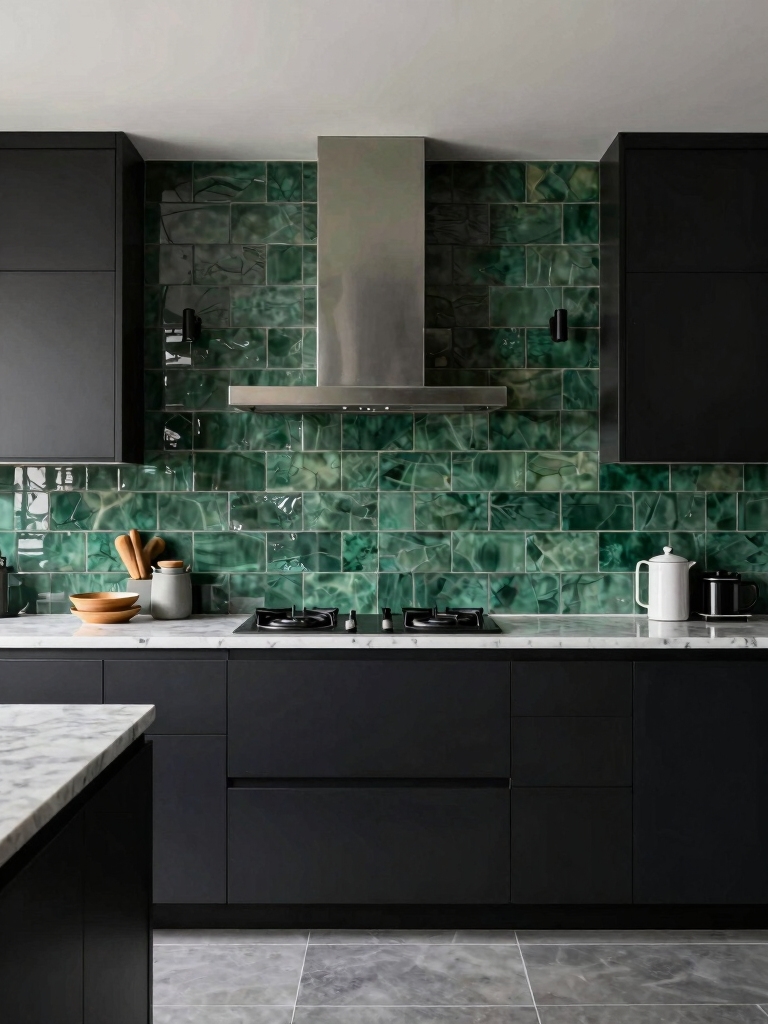
Emerald Mosaic and Matte Black

This one has real edge. An emerald mosaic paired with matte black fixtures and hardware is hard to beat. The tiny glass or stone tiles of a mosaic catch light from every angle, so an emerald mosaic shimmers and shifts as you move through the room.
Matte black faucets, sconces, and cabinet pulls ground all that sparkle and keep it from feeling fussy. The contrast of jewel-green shimmer against flat black is modern, confident, and a little glamorous. Use the mosaic on the main backsplash run and repeat the black in at least two spots so the look feels deliberate.
- Pair an emerald glass or stone mosaic with matte black fixtures.
- Let the mosaic shimmer be the sparkle and black be the anchor.
- Repeat the black in two or more spots to tie it together.
Soft Mint Glass Tiles
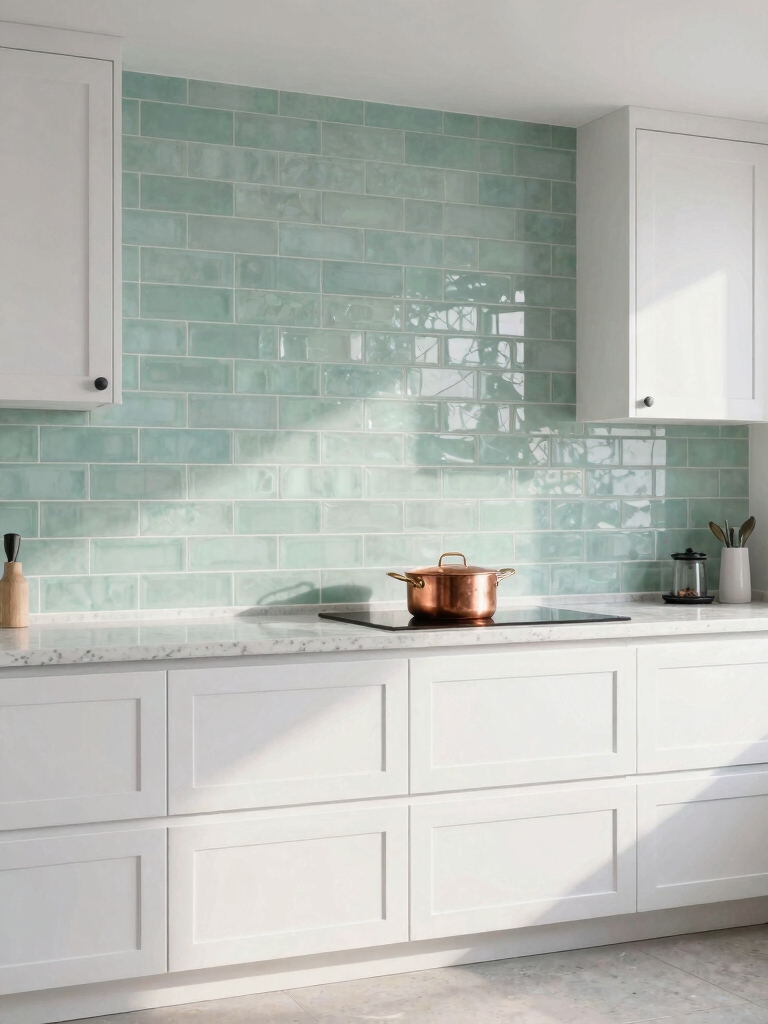
Glass glows. Soft mint glass tile is the breath-of-fresh-air green backsplash, and it has a translucent depth that paint and ceramic cannot match, so a mint glass wall glows with a cool, watery light that brightens the whole kitchen.
Mint glass suits a white or pale wood kitchen beautifully, adding color while keeping everything light and fresh. It is also easy to wipe clean, since glass shrugs off splatters. I recommend a larger glass tile or a slab look over tiny mosaics here, since less grout keeps a glass backsplash looking sleek and clean.
💡Stylist Tip
With any glass backsplash, the adhesive shows through the tile, so use a white or tile-matched setting mortar, never gray. The wrong adhesive can dull a beautiful mint glass to a muddy gray-green. Tell your installer up front, since it is an easy detail to miss and impossible to fix once it is set.
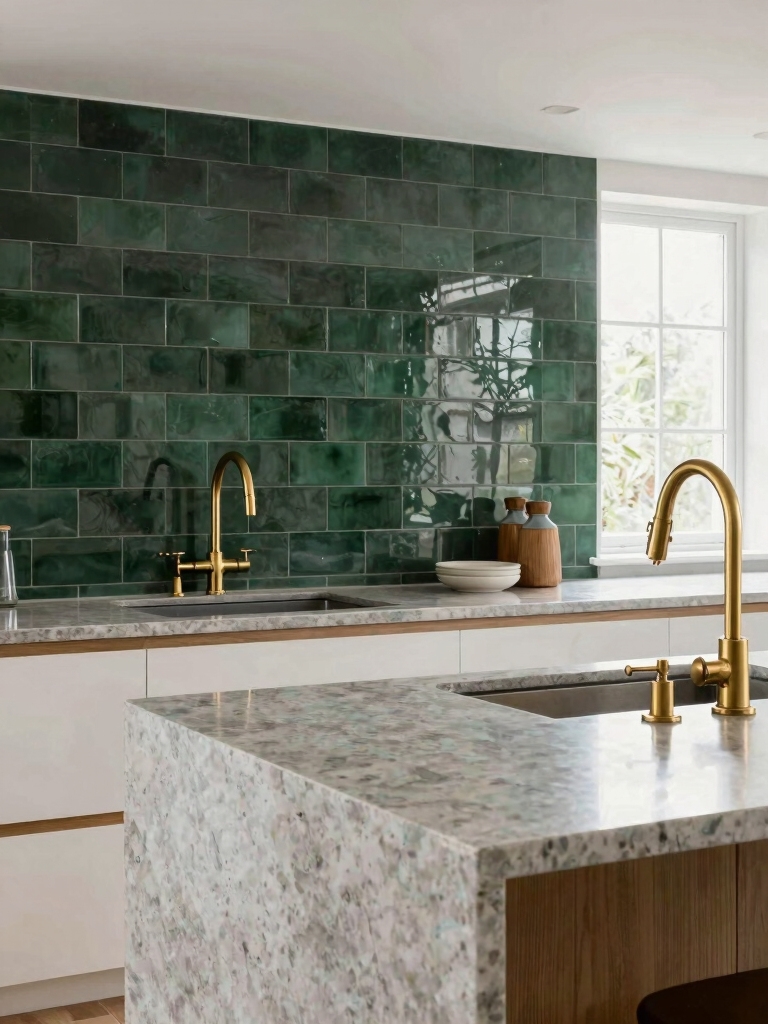
Brass Fixtures and Green Hexagons
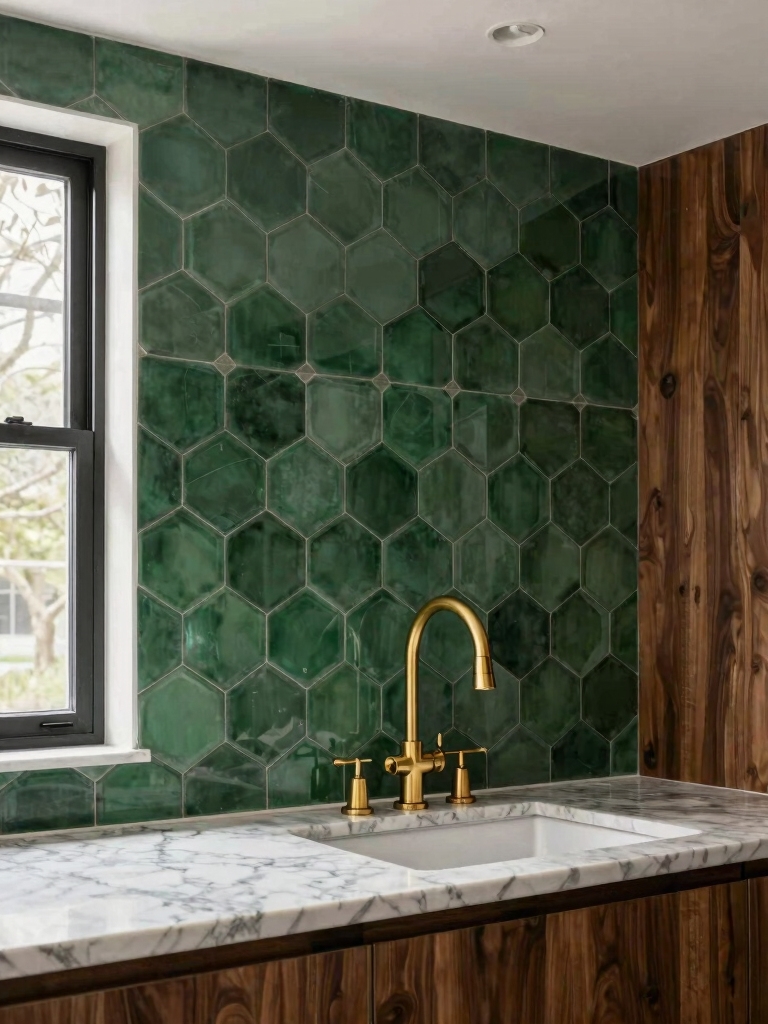
Brass warms it up. Green hexagon tile with brass fixtures is a warm, characterful backsplash that feels both retro and current. The geometric hexagon shape adds interest even in a soft green, and the warm brass heats up the cool color beautifully.
I see this combo work in everything from a sage hex behind white cabinets to a deep forest hex in a moody kitchen. The brass faucet, pulls, and open-shelf brackets pull the warmth across the room. Repeat the metal. Keep the grout soft and the metals consistent, and the green-and-brass pairing looks expensive.
Budget-Friendly Two-Tone Backsplashes
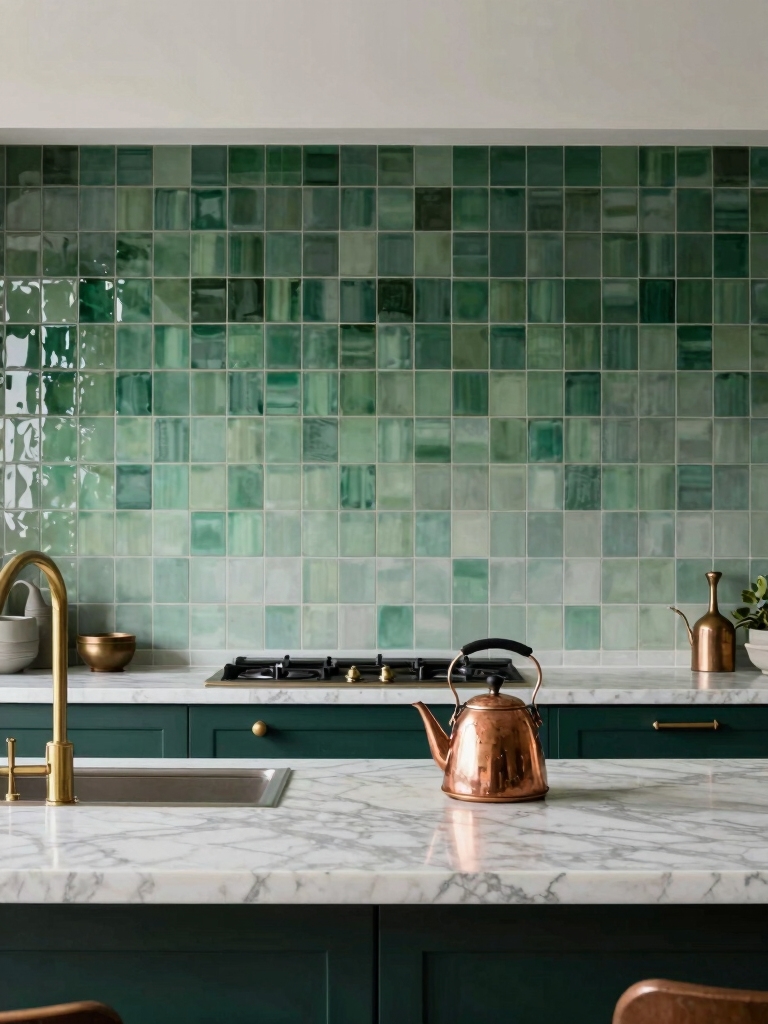
Spend where it shows. You do not need a wall of pricey handmade tile to get a green backsplash, and a two-tone approach, green tile behind the range or sink and plain white subway elsewhere, gives you the color where it counts for a fraction of the cost.
Concentrating the green in one zone makes a small amount of special tile go far, and the white filler keeps the budget down. A green accent behind the range becomes a built-in focal point.
I recommend splurging on a beautiful green tile for that one zone and saving on classic white for the rest. Budget green subway tile runs about $3 to $8 a square foot, so even the splurge stays reasonable. The looks that make a kitchen expensive lean on exactly this kind of smart spending.
Nostalgic Green Meets Modern
Some green backsplashes nod to the past in the best way. A glossy jadeite green, a vintage-look field tile, or a scalloped fish-scale shape brings a nostalgic, mid-century charm into a modern kitchen.
The key is to keep everything else current, clean cabinets, simple counters, modern hardware, so the retro green tile looks like a charming, deliberate choice rather than a dated leftover. One nostalgic green backsplash against an otherwise modern kitchen feels collected and personal. The viral sage looks play with this same old-meets-new energy.
- Choose a vintage-look green: jadeite, fish-scale, or a retro field tile.
- Keep cabinets, counters, and hardware modern around it.
- Let one nostalgic green wall be a charming, deliberate accent.
Teal Penny Rounds With Navy Cabinets
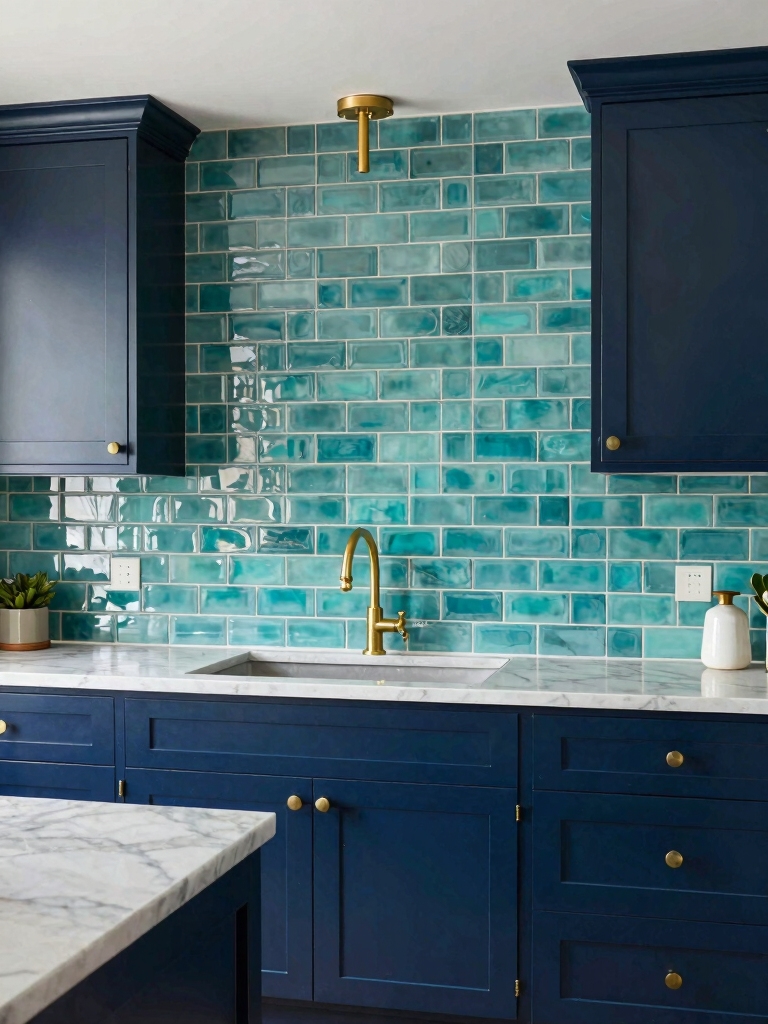
At the boldest, most playful end, teal penny round tile against navy cabinets is a backsplash that truly steals the show. The little round tiles read almost like bubbles, and the blue-green teal sits right beside navy in a rich, watery, jewel-box palette.
Bold, Watery, and Fun
This is a confident, color-drenched look, best for people who love a bold kitchen. It is not shy. The teal and navy share a cool, deep base, so they layer without clashing, and the round tile adds a soft, handmade texture against the flat cabinet fronts.
Balance all that color with a pale counter and warm brass so the kitchen feels rich, not heavy. I love teal penny rounds run behind a bar or a coffee nook, where the playful tile gets to be the star. The green makeovers people love show how far bold color can go.
Maintenance & Care
A green backsplash is easy to live with if you mind the grout. Seal cement grout once a year so it resists stains and grease, or choose epoxy grout up front, which never needs sealing and wipes clean for the life of the kitchen. Wipe the tile down after cooking, since a quick pass takes a minute and keeps grease from building up on a glossy green surface.
Different tiles ask for different care. Know your tile. Glass and glazed ceramic wipe clean with any mild cleaner; natural stone like green marble needs a stone-safe cleaner and a yearly seal to avoid etching. Skip anything acidic or abrasive on stone and handmade zellige, and your green backsplash will look as good in ten years as it did on day one.
More Green Backsplash Questions
?Is a green backsplash a good idea?
Yes, and it is one of the smartest ways to add color, since a backsplash is small, high-impact, and far easier to change than cabinets. Keep the green as your one bold move and the rest of the kitchen calm, and it becomes a focal point rather than a risk.
?What color cabinets go with a green backsplash?
White and pale wood are the easy, bright partners that let the green lead. Warm wood like oak makes a sage or olive backsplash feel natural, while navy or deep blue plays beautifully with teal and emerald. Keep the cabinets simpler than the tile so the backsplash stays the star.
?What is the easiest green backsplash to keep clean?
Glass and glazed ceramic are the most low-maintenance, since they wipe clean with any mild cleaner and resist stains. Choose epoxy grout so you never have to seal it. Natural stone like green marble looks beautiful but needs gentler, stone-safe care and a yearly seal.
The Wall That Makes the Kitchen
A green backsplash punches far above its size. For the price and effort of one small wall, it brings color, character, and a focal point the whole kitchen organizes around, whether you choose the softest sage or the boldest teal.
Pick the green and the tile that match your nerve and your light, give it a calm backdrop, and care for the grout. Done well, a green backsplash does exactly what the best ones promise: it steals the show, and it keeps stealing it for years.


