
The first open shelves I ever styled looked great in the photo and fell apart in a week: the dishes drifted, the plant browned, the whole thing slid back into clutter. It took me a while to learn that styled-and-stays-styled is a different skill from arranged-for-a-photo, and most of the tricks that make it work are ones no one bothers to mention.
Open shelving is having a long moment, and done right it makes a kitchen feel personal and collected. Done on guesswork, it just makes more visible mess. These are the open kitchen shelves styling tips and tricks that actually hold up, the practical ones about the shelf itself and the design ones about what goes on it, so yours look intentional and stay that way.
The Short Version
Most open-shelf advice stops at ‘group things by color,’ but the styling that actually looks designed comes from a few tricks the pretty photos never mention. They start with the unglamorous stuff, the right depth, sturdy brackets, real weight limits, and end with the design moves that make a shelf look intentional: triangulating color, varying height, leaving deliberate gaps.
The good news is that none of it is hard once you know the rules. Get the shelf itself right, edit hard, then arrange in layers and odd numbers with room to breathe, and your open shelves will look like a stylist did them, even though it was just you and an afternoon.
Choosing Sturdy Wood Shelves That Last

Here is the trick I wish someone had told me first: the shelf has to be right before anything on it can look good. Kitchen shelves hold real weight, since stacks of plates run heavy, so depth and support matter more than finish. Aim for 10 to 12 inches deep, enough for dinner plates to sit without overhanging, and mount brackets into the wall studs for real holding power, with support at least every 32 inches to stop any sag.
A solid wood shelf around 1.25 inches thick looks substantial and carries the load, while thin floating shelves are pretty but bow under a full stack of stoneware. Budget roughly $30 to $80 per solid wood shelf plus sturdy brackets. The shelf comes first. Get this part wrong and no amount of styling saves it, the same backbone behind smart open-kitchen design hacks.
- Choose 10 to 12 inches of depth so dinner plates fit without overhang.
- Mount into studs with support every 32 inches to prevent sagging.
- Pick a thicker solid shelf, around 1.25 inches, for heavy dishware.
Display the Right Essentials With Style
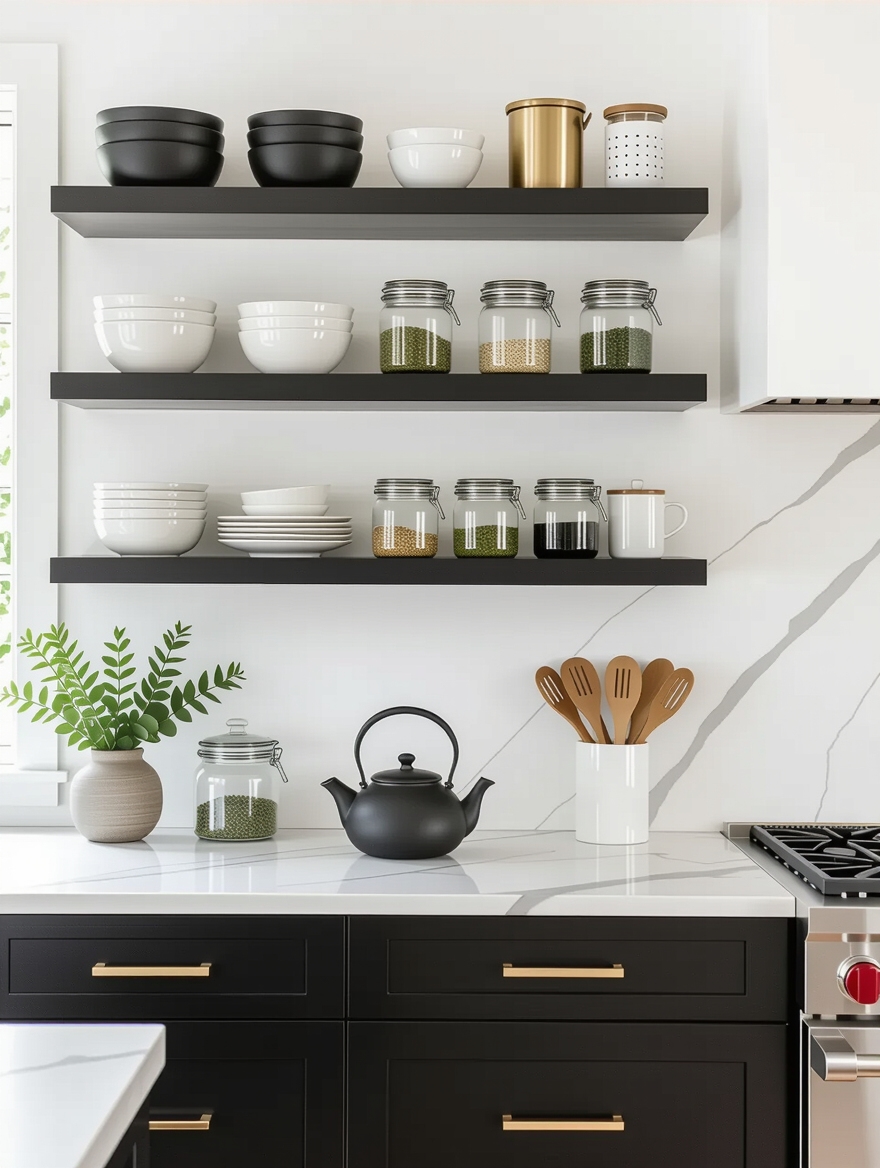
I tell clients the next secret is ruthless editing, because what you leave off matters more than what you put on. Open shelves are for the pretty and the frequent: matching dishes, glassware, a couple of nice serving pieces, things you reach for and would not mind a guest seeing. Everything ugly or rarely used belongs behind a door.
The styling trick here is to mix the useful with the decorative so it looks like a real kitchen. A stack of bowls you actually use, next to a small plant and a propped board, looks collected and intentional at once. If you store it on the shelf, make sure it earns its spot on looks alone, the same edit behind any clutter-free open shelf.
- Display only the pretty and the frequently used; hide the rest.
- Mix everyday dishes with a few decorative pieces so it looks real.
- If it lives on the shelf, it has to earn the spot on looks.
🅰️Solid wood shelves
Strong enough for heavy dish stacks and warm-looking, with visible brackets you can make a feature. Heavier to mount and pricier than floating shelves.
🅱️Floating shelves
Sleek and bracket-free for a clean look. But the hidden hardware limits weight, so they suit light styling and a few dishes, not a full stoneware set.
A Cohesive Color Palette on Open Shelves

Color is where most shelves go wrong, and the fix is a tighter palette than you think you need. Pick two or three colors total and repeat them across the whole shelf run, letting one dominate. A classic split is roughly 60 percent of a main neutral, 30 percent of a secondary, and 10 percent of an accent.
Repeat each color in at least three spots
The trick no one mentions is triangulation: place each color in at least three spots spread across the shelves so the eye travels and the arrangement feels balanced. One red bowl looks like an accident. The same red echoed in three places looks deliberate.
Lean on white, cream, wood, and one accent for the safest, most timeless result. The more colors you add, the busier and smaller the shelves look, so when in doubt, take something off.
Mix Textures on Open Kitchen Shelves for Depth

Once the palette is tight, texture is what keeps it from looking flat. A shelf of all-matching white ceramic is calm but lifeless, while the same shelf with smooth glaze against rough stoneware, woven baskets, raw wood, and a bit of metal or glass gets depth and warmth without adding a single new color.
This is the trick that makes a neutral shelf look expensive. Vary the finishes, matte and shiny, smooth and rough, hard and soft, so light catches them differently across the run. Texture does the rest. A glossy vase beside a chalky bowl and a nubby linen does more for a shelf than any bold color could.
ℹ️Good to Know
Open shelves read as more cluttered than closed cabinets holding the exact same items, because nothing is hidden. That is why a tight palette and visible negative space matter so much more on open shelving than behind doors.
Layer Items by Height for Visual Appeal
Flat, lined-up shelves are the dead giveaway of an amateur arrangement. The trick is to build in layers and height: tall things at the back, shorter in front, and something propped behind to add a backdrop. A piece of art or a cutting board leaned against the wall instantly gives a shelf depth.
Within each grouping, vary the heights deliberately. Stack a couple of books to lift a small plant or a bowl, so no two adjacent items sit at the same level. That little stagger is what stylists call a vignette, and it is the difference between a styled shelf and a storage shelf.
Let groupings overlap slightly front to back for real depth. The eye takes layered, overlapping objects as a designed scene and a single straight line as a cupboard, so a little depth goes a long way.
Arrange Items in Odd Numbers for Balance

There is a reason stylists swear by odd numbers: groupings of three or five look more natural than even ones, which tend to look stiff and symmetrical. Our eyes find a slight asymmetry more interesting, so a trio of objects at different heights almost always beats a matched pair. Threes beat pairs.
The companion trick is the triangle: arrange a grouping so the tallest, medium, and shortest pieces form a loose triangular shape rather than a straight line. Group in threes, build a triangle, leave space around it, and a single shelf suddenly looks composed. It is the most reliable styling formula there is.
- Group objects in threes or fives for a natural look.
- Arrange each cluster into a loose triangle of varied heights.
- Leave clear space around each grouping so it looks deliberate.
How to style one shelf like a stylist.
1Lean a backdrop
Prop a board or art against the wall to add depth behind everything.
2Place the tall anchor
Set the tallest piece, a vase or a stack, off to one side.
3Build the groups
Cluster items in odd numbers, varying height with a book or riser.
4Leave the gaps
Pull pieces apart so there is visible space; stop before it feels full.
Low-Maintenance Plants That Bring Life

A little greenery is the fastest way to warm up open shelves, but the trick no one mentions is that a kitchen is a tough spot for plants, hot and humid near the stove, often low on light. Pick forgiving, low-light plants that can take it: pothos, a trailing philodendron, a small snake plant, or a herb you will actually use.
I love a trailing plant as the styling MVP, since a vine spilling over a shelf edge softens hard lines and adds height and movement. Keep them out of the direct heat and grease zone above the range, and choose a pretty pot in your palette. If real plants defeat you, one good faux trailing plant on a high shelf fools almost everyone.
- Choose forgiving low-light plants like pothos, philodendron, or snake plant.
- Use a trailing plant to soften shelf edges with height and movement.
- Keep greenery away from the hot, greasy zone above the stove.
Vintage Treasures That Add Character

The trick that separates a personal shelf from a showroom one is a few pieces with age and a story. A worn wooden bowl, an old crock, a piece of vintage stoneware, or a flea-market pitcher adds the character that brand-new, matching sets never can. These pieces break up the uniformity, hint at a real life, and make a kitchen feel collected over time rather than bought in one trip.
The styling secret is to scatter just one or two vintage finds among your clean modern pieces, since the contrast is what makes both look intentional. Hunt them at thrift stores, estate sales, and your own grandmother’s cabinets, where the best ones are free.
- Add one or two aged, characterful pieces among your modern ones.
- Let the contrast of old and new make both look deliberate.
- Source vintage finds from thrift stores, estate sales, and family.
Personal Artwork and Framed Photos

Here is a trick that surprises people: art belongs on kitchen shelves too. A small framed print, a piece of pottery, or a leaned photo brings personality that dishes alone never will, and it signals that the kitchen is a real room in the home. Leaning a frame against the wall behind a few objects is the easiest way in.
I recommend keeping kitchen art practical, since steam and grease are real. Choose framed pieces with glass you can wipe, or inexpensive prints you will not mourn if they warp, and keep them away from the steamiest zones. A single piece of art on an open shelf does more for warmth and personality than another stack of bowls ever could.
Functional Yet Stylish Shelf Decor

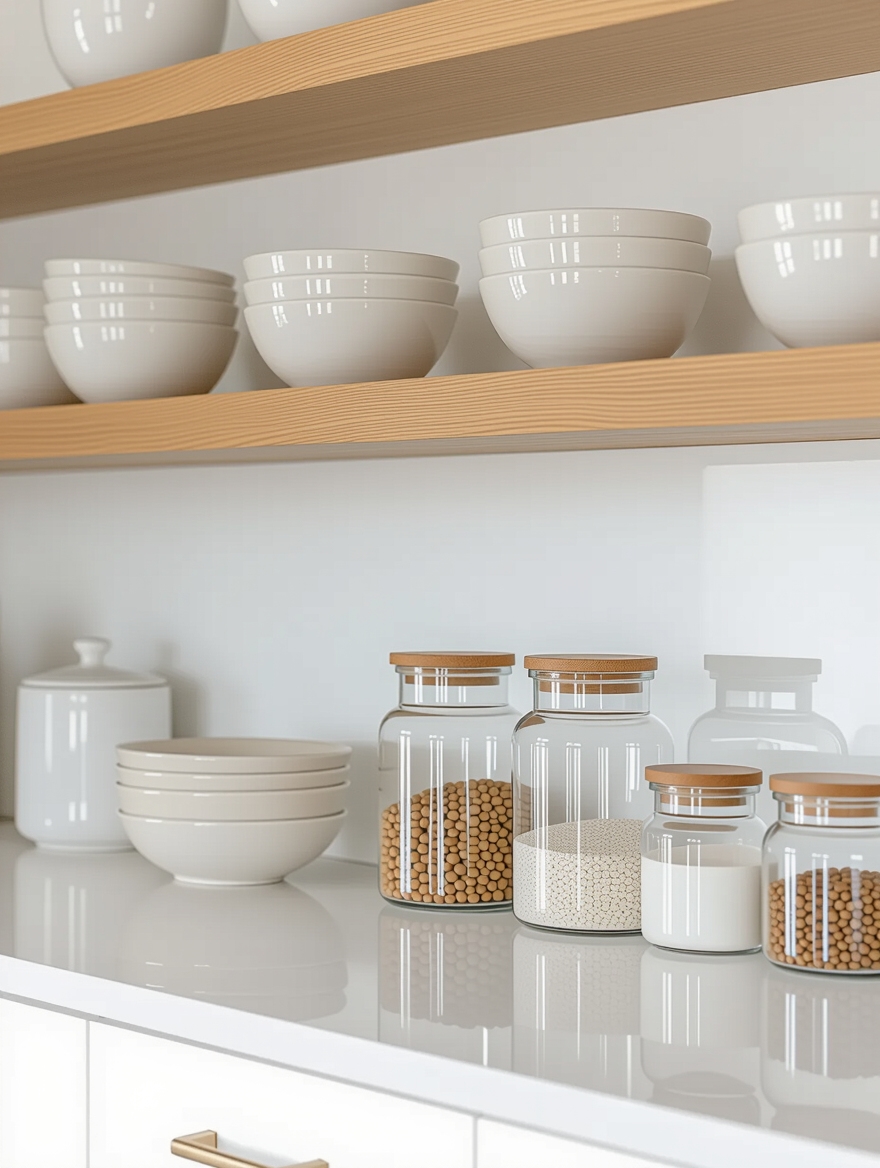
The most satisfying open-shelf trick is choosing pieces that look good and earn their keep, so the styling never feels like wasted space in a working kitchen. A row of matching canisters holds flour and sugar while looking tidy, a wooden board is both decor and a tool, pretty glass jars store dry goods on display, and a stack of good bowls is ready to grab.
This is the secret to shelves that survive real life: when the beautiful things are also the useful things, you put them back in their styled spots automatically, and the arrangement maintains itself. Style with what you actually reach for, and the shelves stay sharp without daily fussing, the same logic behind any well-judged interior touch that lifts a kitchen.
- Choose decor that doubles as tools: boards, canisters, jars, good bowls.
- Store dry goods in pretty jars so storage looks like styling.
- Use what you reach for daily so it returns to its spot naturally.
Maintenance and Care for Open Shelves
Open shelves ask for a little upkeep that closed cabinets do not, and knowing it up front keeps the look from souring. Everything on display collects dust, and anything within a few feet of the stove catches a thin film of grease over time, so plan to wipe pieces and shelves down every week or two, more for the lower, closer shelves. Keeping the prettiest and least-used items higher and away from the range buys you longer between cleanings.
Restyling is its own small ritual. Every season or so, take everything off, dust the shelf, and rebuild the arrangement, swapping a few pieces and editing out anything that crept in. It takes about twenty minutes and resets the whole look. Treat the shelves as a living display, and they keep feeling fresh instead of frozen.
Open Shelf Styling Questions, Answered
?How deep should open kitchen shelves be?
About 10 to 12 inches, which holds dinner plates and most everyday items without overhanging. Shallower shelves around 8 inches suit cups, glasses, and decor but cannot take large plates. Whatever the depth, mount the brackets into studs with support at least every 32 inches, since kitchen items get heavy fast.
?How do I keep open shelves from looking cluttered?
Edit hard and leave negative space. Use a tight two-or-three-color palette, group items in odd numbers with gaps between them, and only display the pretty and frequently used. Open shelves always look busier than closed cabinets holding the same things, so showing less is the single biggest trick.
?What should I put on open kitchen shelves?
A mix of the useful and the beautiful: matching dishes, glassware, pretty canisters, a couple of vintage pieces, a small plant, and one piece of art or a leaned board. Keep the colors tight and the heaviest stacks on the sturdiest, lowest shelves. Hide anything ugly or rarely used behind closed doors.
?Are open shelves practical in a kitchen?
Yes, if you style them with pieces you actually use and accept a little extra dusting. They put everyday dishes within easy reach and make a kitchen feel personal, but they collect dust and grease, especially near the stove. Choosing functional decor and keeping the messiest gear in closed cabinets keeps them practical.
?How often do I need to restyle open shelves?
Day to day, almost never if you style with what you use, since pieces go back to their spots naturally. Plan a deeper reset every season or so, about twenty minutes to dust, edit, and rearrange. Wiping for grease and dust every week or two, more on lower shelves near the stove, keeps them sharp in between.
Styled to Stay Styled
The real secret to open kitchen shelves is that the magic is half practical and half design: a sturdy, well-mounted shelf and a hard edit first, then a tight palette, layered heights, odd-numbered groupings, texture, and a few personal pieces with breathing room. None of it is complicated once someone finally tells you the rules, and together they turn a risky open shelf into one that looks intentional and survives real cooking.
If your open shelves feel more cluttered than curated, you might strip one shelf bare and rebuild it with just these tricks, a tight palette, three groupings, varied height, real gaps, before touching the rest. That one shelf usually teaches your hands the formula, and the others come together far faster from there.


